Huglu 20ga SxS – Review after two years of use

For years, the urge of owning a nice side by side shotgun in 20ga has floated around in my brain, briefly resurfacing from time to time, but never becoming overwhelming. Mostly because I didn’t hunt birds very often, and more importantly, because the price tag on most of these guns caused heartbeat irregularities and sudden surges in blood pressure every time I looked. Spending some time (days) in a hospital bed, waiting for a surgery spot to open, slightly delirious with hunger, I decided the time had come. And I knew which one I wanted: the CZ Bobwhite G2.

Contacting a local dealer, it quickly became clear that getting one ordered and imported from the US would come with very uncertain timelines. Months for sure, many months perhaps. But the dealer had an alternative. Apparently, the Turkish company Huglu makes the gun that CZ rebrands and sells as the Bobwhite model. And they had several Huglu shotguns in stock. Just not in the same finish, and not with the same barrel length, but cheaper and available immediately. So, a few days out of the hospital, we made the 5-hour road trip, one-way, to have a peek, and maybe bring one home.

First impressions

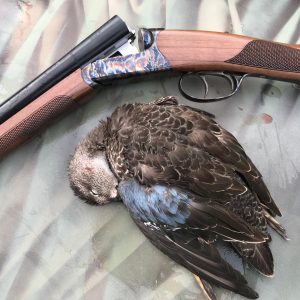
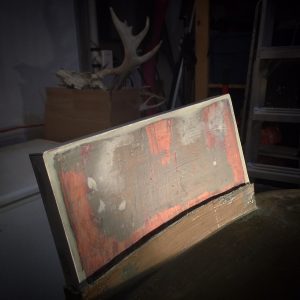
Honestly, I was not impressed by the looks of the gun, but my intention was to buy something that I would not be afraid to use. I wanted to drag this up mountains and ridges to look for blue grouse and ptarmigan, and put in the kayak when paddling for ducks, and drag through coulees and marshes, without having to worry about denting or scratching it. This one would probably fit that bill. The case colour hardening looked “thin”, and lacked the characteristics of a quality finish of that nature. It almost looked like a spray-on job, the colours vibrant, the pattern oddly regular. Hard to imagine this finish would last very long. The opening lever had a gold-coloured double-headed eagle, acceptable if stand alone, but rather boldly contrasting with the case colouring.

But the little gun fit! Eyes closed, shouldering, and finding the bead sitting right where it needs to be, was a pleasant surprise. Just shouldering the gun a couple of times had me sold, and forgiving it all the finish gaudiness. For a cost of just under a thousand Canadian dollars, it was not hard to justify this purchase. You wanted a gun over which you wouldn’t cry if you hurt it? Well, here it was.

After two years of use

The front trigger proved a bit heavy, and opening the gun requires a little downward tug on the barrels. The latter will likely improve with time, the former might require a polish, but in the field, it doesn’t seem to bother me. Hard to recall how many rounds went through this gun, or how many times I have taken it out into the field. Wild guesses would be 500-600 shells, and maybe thirty outings: hunting days, range visits and shooting during dog training and NAVHDA trial events.

The gun has not disappointed in terms of fit. If I do my job, don’t rush the shot, shoulder the gun cheek-first, keep my eyes on the birds, and don’t think, good things happen. I’ve made some amazing (in my world) shots, and had some events where I shot way above my pay grade. I attribute that mostly to the fact that my body and the guns dimensions just mesh. There are, however, a few things that need mentioning. It’s not all puppy dogs and rainbows.

The finish. I knew it. It started coming off within months of using it. Around the grip and trigger guard it is completely gone, similar on the bottom corners of the action; any place where your hands regularly touch it.
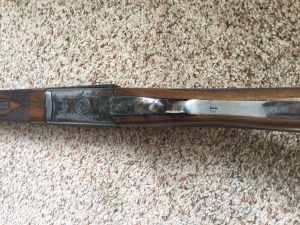
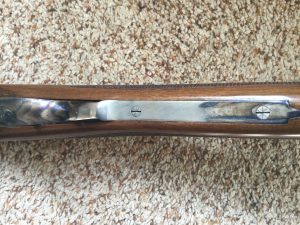
That was not the first issue. After shooting a few rounds of trap on the range, pins started coming loose. The pins that hold the cocking levers, and the one on the forend. As it happened at the end of the first season, I sent it back for a warranty repair. Months later the gun came back, with new pins installed, reportedly. The next range session, it happened again. Instead of sending it back once more, I used some epoxy to set them in place. So far so good. Time will tell.
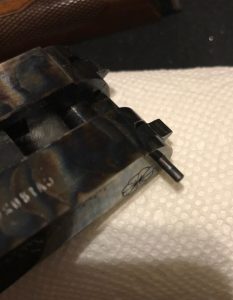
Unfortunately, there is more. The forend has started to wobble. There is side-to-side movement, where there should be none. Easily remedied for now, by putting some electricians tape inside the barrel channels, but in time this may need gunsmith intervention. For just two seasons of fairly light use, that is disappointing.

Conclusion

Since I am the worrying kind, I worry about what issue might arise next. Clearly, the quality of this firearm leaves something to be desired. Or should I be fairer, and say: you got what you paid for. The next step up in price would easily put five thousand devaluated Canadian dollars on the credit card, and likely one or two thousand more. Such a price difference would have to show itself somewhere, in this case a finish that doesn’t deserve the name, poorly fitting pins, and (perhaps) improperly hardened or lower quality steel on the forend lock.

Maybe it is time to start counting my pennies, regularly putting some change into an old tin, and investigate what options are out there on the right side of affordable, without getting cheap. In the meantime, I’ll keep taking this gun up and down ridges, through swamps and coulees, and hope that magic keeps happening, every time the operator doesn’t get too excited and messes things up. Unfortunately, that still happens way too often.

Frans
Seek Outside Cimarron Light/Stove combo – first experiences

I’m getting old. There, I said it. Bones ache, injuries comes easy and take a long time to heal, and mostly, I feel a strongly decreased desire to endure discomfort. Cold nights in a tent on a windy mountain don’t appeal as much as they used to, and they only appealed moderately to begin with. For some reason cold gets to me quickly, which would make for a very short outdoor season if I were to give in.

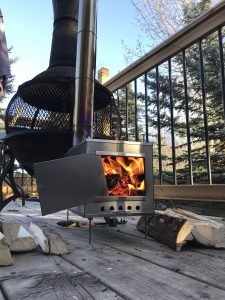
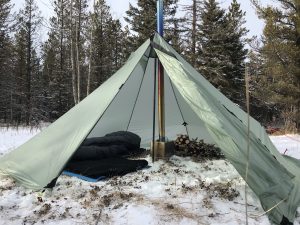
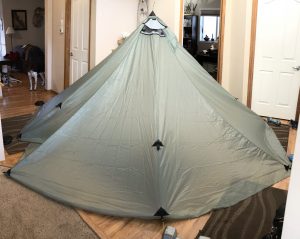
Enter the “hot tent”. Horse guys have drug around canvas wall tents and iron stoves for a long time, but backpackers had to wait for lightweight fabrics and thin light sheet metal and the idea of some brilliant manufacturer to put it all together into something that could be carried on a man’s back without breaking it. I don’t know when the first lightweight stoves came onto the market, probably long ago, as I am generally slow to catch on, but after enduring years of marketing, and mostly positive reports on the media, I finally gave in and ordered a Seek Outside Cimarron Light pyramid-ish tent and their Large sized titanium box stove and chimney pipe.

Last weekend the weather was perfect for laying on the couch, watching Youtube videos of people catching big trout in sunbathed Western rivers, so after some serious discussion with the inner sloth, I packed up and headed out, encouraged by a very excited pup who figured all this gear accumulating by the front door could only mean one thing: we’re going hunting! Here are a few observations based on this one night of experience and the preparations leading up to that.

  1. The seams on the tent need to be sealed. You can either do that yourself with the provided tubes of goop, or have Seek Outside do it for a fee. Before going cheap like I did, consider if you have a spot where you can either set-up, or hang and stretch out this tent with a sizeable footprint, and still be able to walk around to apply the goop. Also consider the weather if you are considering doing this outside, since the stuff needs a certain temperature to set properly. Let the goop sit long enough for it to set completely!
  2. Do a trial set-up in controlled conditions (a good idea with any tent). The tent comes with pieces of cord that need a loop tied to them and finagled through the pieces of plastic on the stake-out points. Best done indoors, and not on a windy hillside somewhere with your fingers freezing.
    The stove, mostly the chimney, needs a break in (by burning a fire in the stove, so the metal will heat-set). First-time rolling of the chimney is best done with a few people and a piece of PVC pipe as a mold. I’ve seen video of a guy trying to do this alone in the field, and the result was a severely mangled chimney pipe. After the first burn the metal will have a tendency to pop back to the shape it was in under heat.

    Staking the tent fabric close to the ground requires that you keep the loop in the cords as close to the tent as possible, with the stakes hammered in at an angle. The shape of the tent causes an upwards pull on the loops, which you can counter by having the stakes in at, say, a 60 degree angle. Then if you want to have ventilation space at the bottom, you can slide the loops up until they sit in the notches near the top of the stakes.
    By the way, this tent has three guy-out loops, on the sides that do not contain the door, but it does not come with cord to do so, and it comes with only one extra tent stake surplus to the number of stake-out loops on the bottom, so you’ll need to buy two more stakes or rely on vegetation or rocks.
    Do NOT hammer in the stakes too deeply if you are dealing with frozen ground, or you’ll have a heck of a time getting them back out.
  3. The carbon pole is a four-piece affair, though it comes assembled as a three-piece. You can even manipulate it so in storage it is a two piece. Here is the danger. The springy thingies at the end of some of the pole segments, used to fasten the pieces together are not secured inside the poles! Innocuous as it may sound, if by improper handling you manage to push one or more of those things further into the pole sections, the metal protrusion doesn’t pop up anymore, and you cannot fit the pieces together! I got lucky that I hadn’t pushed them too deeply, or I’d have been hooped, or would have had to chop a sapling to size to get the tent set up. Now I got lucky and with a tiny stick I managed to push them back out. Of course these things always happen at -15 oC/5 oF and never during a summer’s day. So beware of those springy thingies, keep the protrusions popped up through the holes in storage, which may mean sticking with a 3 piece.
  4. Set up in the field was easy, with the previous practice in mind. Stake the corners, push up the pole, stake the remaining loops and guy-outs, all pretty simple (there was no wind). In a gale I can imagine this being a little harder. Stove assembly is fairly simple too, though fitting the rods through both holes (top and bottom of the stove) can be a bit tricky. Keep in mind that all this is simple in the backyard, with a beer to wash away any frustrations, but can become a major task after a long arduous hike in sub-zero weather. Try fitting a small wingnut on a threaded rod with mitts on, and you’ll understand.
  5. It wasn’t very windy, but there was a fair bit of movement and some creaking where the chimney meets the stove, and flapping of tent fabric whenever there was a breeze, so it will be interesting to see how this all behaves when the winds are up to 50 mph (not uncommon around here).
  6.  Floorless. To floor or not to floor. I guess it depends on conditions and the type of trip. If you want a stove, you need a floorless, I assume, to prevent melting a hole in your tent? For argument’s sake, let’s say that is correct. If you are on a run and gun kind of trip, on the move all day till late at night, jumping in the tent just to fix a meal and sleep (and you don’t need a stove to keep you warm while sitting around), then a regular backpacking tent would be preferable. But if your are spending any amount of time in camp, going in and out of the tent regularly, or you are camping around the winter equinox with more hours of darkness than daylight, then the flexibility of the floorless tent with some headspace is nice to have. Keep your boots on when you walk in and out (walk, not crawl), a warm place to sit and read whiling away the long dark evening before bed time, it’s all very nice to have. If you are planning to hunt out of a fixed location where you’ll be returning every night, the little extra weight of the tent/stove combo is definitely worth it. If you run into weather, like days of rain on end, it seems like a no-brainer that the comfort of this set-up compared to holing up into a small one-person tent can make the difference between going home and staying out. Throw a dog into the mix, and the choice is clear. No risk of nails puncturing the tent bottom, no muddy paws all over your stuff. Provided you have taught him the difference between a sleeping bag and the dog blanket. Mine is a work in progress in that respect.
  7. Condensation and bugs, the big issues. Unfortunately I will have to defer judgement on those. At -15 oC there are no bugs to worry about, and any moisture in the air does not turn to droplets on the tent’s inner, but it freezes. Clearly there could be moisture issues. During the night I could see a layer of frost build up on the fabric above me. However, this disappeared quickly whenever the stove was going. That said, the bottom foot of fabric was never ice-free. Heat rises and the outside bottom edge is pretty far removed from the source of heat. It will be interesting to see how this will pan out during humid but above-freezing conditions. Keep in mind that this tent was purpose-bought for the mission, which is early and late season hunting or exploration, and that it is unlikely that I will use it without the stove, which should keep condensation issues to a minimum. Ask me again in six months or so.
  8. This tent has a huge footprint for a two-person shelter. I know it is claimed that four guys can sleep in this (with their gear outside). You can probably fit 5 or 6 in there if you really wanted to, but for comfort (which is where we started out), I’d say that two persons, and one gun dog, with room for gear, stove and firewood is about as good as it gets. See comment above about the ice build up on the bottom. I’d not want my fancy down sleeping bag to be rubbing on all that ice, and subsequently get wet, so the effective footprint is a little smaller. You can stuff some non-temperature sensitive gear closer to the edges I guess, but given that everything  you put there will freeze, keep things more centralized could be advisable. For me and my hunting puppy this is a little palace, and over time we’ll figure out the optimal configuration of who lies where. E.g. putting a puppy that likes to chew on sticks next to the stack of fire wood, when you are trying to sleep, is not a good idea.
  9. Running the stove to provide a steady temperature level inside may require a bit of practice, and may require manipulating damping controls in the door and chimney and size of wood used, considering also the dryness of your fuel, the amount of ventilation you have going, and so forth. Also note that this thing has no thermal mass to speak off, so when the fire dies down, the temperature drops rapidly.
  10. I have yet to discover how best to transport the stove in a backpack. The tent is easy enough as it folds and rolls up and fits into a shapeless bag that you can stuff anywhere. The stove is made of awkwardly rectangular panels and the pipe, even rolled up sideways, has some bulk. The sheet metal is thin enough that I suspect you don’t want to crush it too much with compressions straps common on most backpacks. For this first trip I strapped it to the outside of my pack, where it covers up two external pockets, and gets undone every time I need to be in the main bag. Something I need to work on. If anybody has experience with transporting these things I am open to suggestions.
  11. Cooking: I trusted my ability to get a fire going (got lucky, threw in a spare lighter and wouldn’t you know it, the main lighter wouldn’t fire!), and did not bring a gas burner, just a billy pot to put on the flat upper of the stove. While a little slower than a Pocket Rocket or Jetboil, you can boil water reliably, or endeavour more challenging culinary experiments. Remember though that you’re not supposed to do that in your tent in grizzly country. And grizz stay out a lot longer than you think. Just because we had a few frosts and some snow doesn’t mean that they are all hibernating.
  12. The verdict: would I buy it again, knowing what I know now? It’s perhaps a little early to tell. It got me out on a weekend that was cold enough to keep me from overnighting with regular gear, so that’s a win. Set up on flat ground is easy enough; stove transport a little awkward until I learn a better way. You can stay warm and dry out gear in cold and wet conditions. Unproven (by personal experience) as yet in the wind. It’s a fantastic shelter if you are bringing a dog. It has a lot going for it therefore. At US$ 929 plus shipping it is not a cheap proposition, but then lightweight comfort in the backcountry seldom is. It may just be the ticket to keep these aging bones going to the mountains a little longer. What would make it really perfect would be one those small folding chairs. Ah, the luxury of leaning back, stretching the legs, putting another mini-log on the fire, taking a swig from the hip flask, admiring the wet-steaming dog that pointed those coveys of ptarmigan, while the weather outside is taking a turn for the worse… wait, that might be next year’s adventure.

DISCLAIMER: All experiences listed above are based on two set ups, of which one in the backyard, and a grand total of 15 hours in the tent (5pm till 8am).

FD

Project Duck Boat – Part V (Finale)

The alarm went off at an ungodly hour, and it took a quick shower to get some of the haze out of my head. I don’t know who these people are that jump out of bed straight into their boots, and are ready to go, and I don’t understand how they do that. Regardless of what the day ahead has in store, waking up is a process for me. With joints creaking I took the dogs out for a quick one, and slowly the blood started pumping and the brain geared up.

It was a long dark drive to the lake I had scouted out in the spring, and this being opening day, I feared I’d show up at the sandy staging area on the North side a little late, with other hunters out on the water before me. This sneak approach really only works if you are the only one, or the first one, to paddle along the reeds.

I needn’t have worried, nobody was there. It was still cold, and the last of the fog was rising off the water as I set off. In spring the marsh had been full of sound of ducks and geese. It was a lot quieter now. The 20ga loaded with steel shot #4s rested on my right, and slowly I paddled the meandering water. When a couple of teal came soaring past, I dropped the paddle, grabbed the gun, swung, and missed twice. Not a great start.

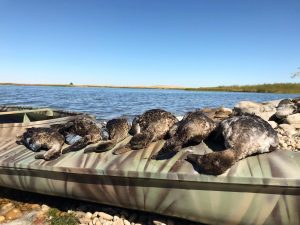
A little later I happened upon a pair of teal, that took off as soon as I came around the bend, and I managed to drop one! As the morning progressed I added three more to the tally, before I ran out of suitable water. There had been some gun shots on the south side of the lake but otherwise I had the place to myself. Plenty happy with my modest harvest I drove home.

That night we had a wonderful dinner of pan-seared duck breasts. Ducks make a fantastic meal, if treated right, meaning searing it on high fire and briefly. You want, no must have, the insides still pink, or risk the meat turning dry and livery.

We ate this with ciabatta bread, oven-roasted tomatoes and onion, and a balsamic reduction drizzle (that’s nothing more than balsamic vinegar mixed with brown sugar, allowed to simmer for a bit to make it thicker). It was fantastic!

A week or so later I repeated the routine, hitting up a larger reservoir that has, according to Google Earth, lots of bays and islands on the East side. I’d love to report about my shooting prowess, how I plucked the ducks and geese from the sky with ease, but that would be lying. Two double misses started the morning, but luckily I was up for some redemption and ended the day with a tally of six ducks. The number of shots fired will hopefully fade from memory, as my brain chooses to remember the highlights of the day only.

This is not a way to get big bag limits, and it was never intended that way. But it allows quiet time on the water, taking in the sights (like the two otters I saw on the first outing), relaxing through the morning, and potting the odd bird for dinner. It’s nice too to vacate the water before noonish, as this is generally a day resting area for birds, migrating birds in the latter half of the season, and they need their quiet time too.

And that’s it. Project Duck Boat finished, but in a way it’s just beginning. We have a month or so left of open water, suitable for such a little boat. I have no intention to fight the fall storms and freezing water. I can get hypothermic in other places without the risk of drowning. Next spring, pike will be waiting in the reeds, to eat the fly that I will present to them.

Good times!


Project Duck Boat – Part IV

Though the solid fresh green colour of the boat really was appealing, the glare was pretty apparent, and for duck hunting purposes it would likely be better to have some drab colour on there. So I decided to try my hand at putting a gentle camo pattern on.

The Rust-Oleum camo spray cans were surprisingly hard to find. I had to go to three hardware stores to get three colours: brown, tan, and light green.

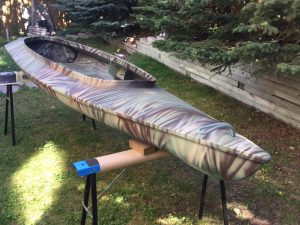
The process was pretty straightforward. After a quick scrub down with steel wool and rubbing alcohol, the boat was sprayed with  a base layer of varying colours; four areas of solid colour covered the whole thing. Then I used dry cat tail stems and leaves as a stencil of sorts, spraying contrasting colours across the leaves. For sharp edges, the leaves would lay flush with the boat, for a more fuzzy effect I’d hold them up a little higher. In general, I didn’t give it too much thought, and fought my inner perfectionist from overworking the colours. Just flop on the plant material, and with quick squirts from left to right and back, get some paint on.

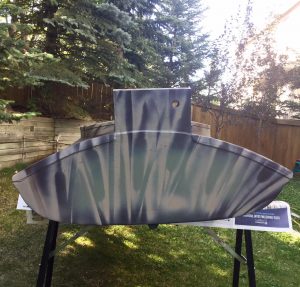
For example, on the stern of the boat, the pattern was achieved by laying a base coat of brown and green, and then spraying a layer of tan with leaves/cattails held in front of it. The tan went through the openings in the plants, leaving the darker base colours to show through on the boat. It’s a lot easier to do than it is to describe.

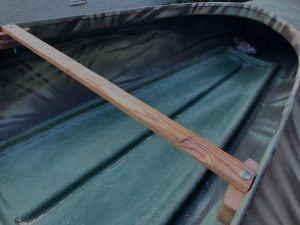
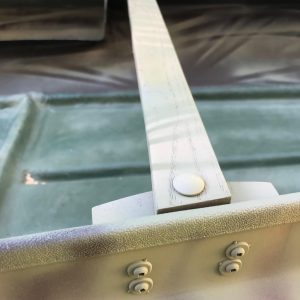
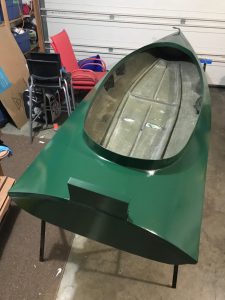
The final touch (for now) was to add a cross bar, which would serve as a rest for the gun barrel(s).  I didn’t feel comfortable laying a loaded shotgun down flat on the bottom of the boat, because an accidental discharge (never happens, right?) would have some very wet and potentially life threatening results.

A few final squirts of camo paints, and she was all done. Well, almost; I added a strip of rubber on the right side of the cross bar to be gentler on the gun’s finish.

The boat was ready, and duck season was just around the corner (see part V – Finale).

Project Duck Boat – Part III

The boat was looking pretty functional, but the inside needed some tuning up, fixing cracks and chips in the gel coat, adding some foam to the flotation and putting on the top trim.

The push fit trim fit perfectly, and will provide protection from and for the fiberglass edge.

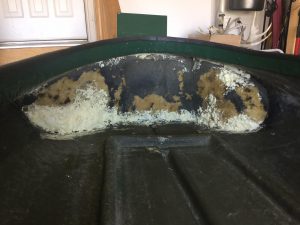
The polyurethane foam from a can was nasty, sticky, and probably unhealthy stuff to work with. It stuck to tools, to hands (gloves!), the floor, my clothes, and some of it even to the old foam in the boat. I could not make this look fancy, so I settled for functional.

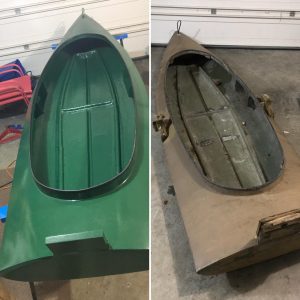
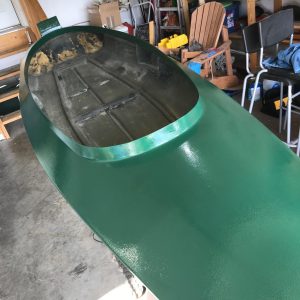
After patching the inside bottom, it was time for the final coats of paint and varnish. The transformation was spectacular, if i may say so myself.

I decided to not rebuild the oar locks. In fact I built one, from hardwood , but didn’t put it on. The boat is more like a square-stern kayak, and the oar locks would be sitting quite close to the rower, making for an awkwardly short stroke. I would paddle it like a canoe at first and make further decisions later.

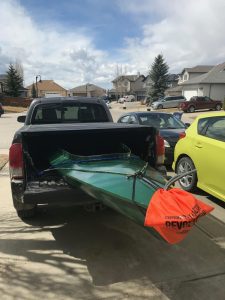
I had some trepidation if I would actually be able to transport it in the truck, but that worked out OK.

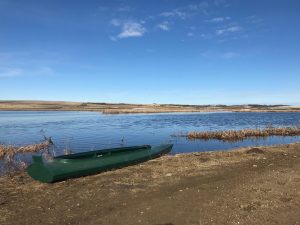
The maiden voyage took place on a beautiful spring morning. I went looking for snow goose, found none, but did manage to sneak up on dozens of waterfowl, within easy shotgun range. The concept of using this boat to cruise the edges of lakes might actually work!

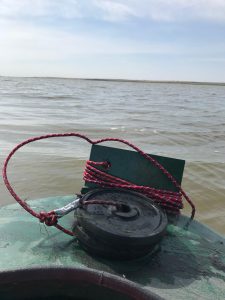
After this first trip,  I decided to add a hole to the outboard mounting plate, so I could rig up an anchor of sorts, which would be helpful for fishing trips.

With spring season over, it was time to put on the final tweaks (see Part IV).


Project Duck Boat – Part II

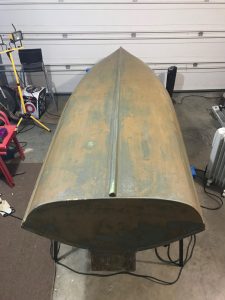
After a thorough clean and a a proper sanding job, two things had become clear. Firstly the outside of the hull was not in as bad a condition as I had thought, and secondly, there were a lot or divots, scratches and imperfections to fill up. I decided on a skim coat of epoxy for most of the underside.

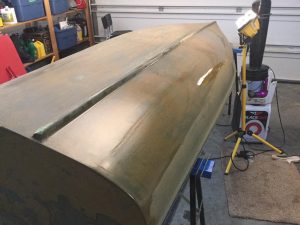
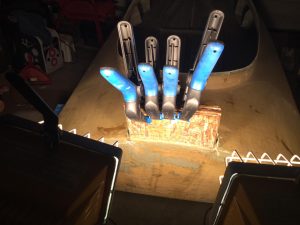
Since I was using slow-setting epoxy, the same kind I used when building the longbow (see Building a Longbow – Part II ), I needed a source of heat the keep the epoxy well above room temperature while outside the snow was blowing and it was freezing hard. I went through a number of heaters. My electric ceiling heater overheated and started spewing smoke, and a heating fan motor just stopped. The plug of an electric radiator became so hot that it could only be used a few hours at a time. The construction lights proved the most reliable but they only covered smaller areas. (lights below are pointing upwards to reduce the glare for the photo)

It took about a week to get the skim coats done, and a first layer of primer put on.

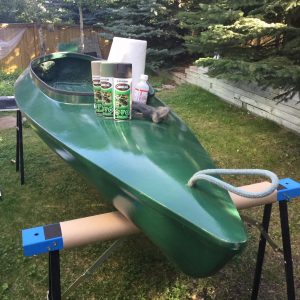
The next step was very satisfying: putting on a coat of paint! Not wanting to spend hundreds of dollars on a true marine paint meant for vessels that are in the water for long periods of time (like in a harbour), I picked paint that was meant for surfaces exposed to water, but not necessarily submerged all the time. The outside of the boat looks like the million bucks I didn’t spend, once done.

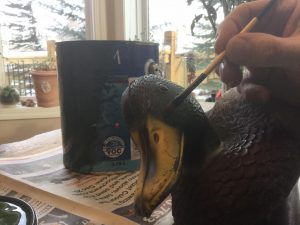
I used the same green to touch up some mallard decoys.

The inside of the boat still needed a fair bit of work (see Part III)

Project Duck Boat – Part I

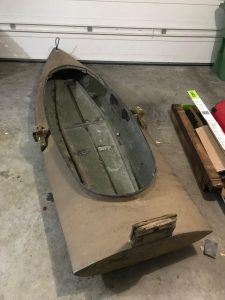
She came to me on a cold November evening, and was unceremoniously dumped onto my garage floor. When Lee had said she might need a bit of work, he hadn’t been kidding. Anything wood was crumbling, anything metal had rusted, the fiberglass would need some touching up, trim had partially come off and was swaying gently in the cold Western breeze. But on the bottom lay a gentle layer of mud and grass, faintly smelling of the marsh. A few duck feathers clung to the hull, stuck to a patch of dried-up blood. It was clear: this was my new duck boat.

Where I live, it’s rather hard to give a boat, or anything really, a good hose-down between mid-October and some time in April. First of all, the water will be disconnected to prevent freezing of the pipes, and unless you want to turn the cull-de-sac into a hockey rink, water is best not used outside. But a series of buckets with hot water and soap turned to mud as I tried to clean my new prize inside and out. The kitchen drains did not clog, so I must have diluted the grime sufficiently.

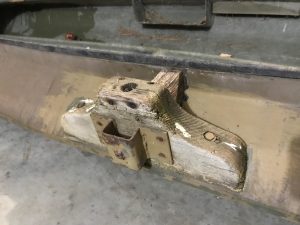
The boat was stripped of anything that would come off: the oar locks, protective strip along the top and the piece of rotten wood on the transom. Before me now lay a blank slate. One in need of some serious sanding, a coat of epoxy and a few layers of paint. But first the most pressing issue needed to be addressed, the rotten outboard motor mount.

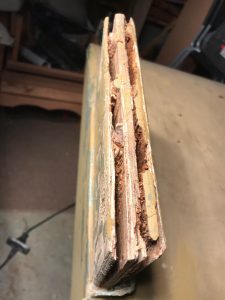
I have no immediate intention to use a motor, but it would be nice to have that option some day. Unfortunately the wood of the mountain plate was very wet and very decaying. All the softwood layers of the multiplex had turned to mush, in I spent a few days prying away at it to get that out as much as I could. Then I set the boat upside down and ran a heater under the transom for a long time, until, much later than I had thought, the inside appeared to be dry. In the mean time I started work on the hull (see Part II).

Enter modern chemicals, which according to the label turn mushy, punky wood into rock-hard material. Not sure if it did, but I poured it on thick. Next I used hardwood and bamboo strips and an epoxy to fill up the voids. It still being the middle of winter, all use of epoxy required lamps or heaters to provide a temperature that allowed it to set.

Once that was done, I rebuilt the outside by using aluminum strip, filling the surface with more epoxy.  Time to continue working on the hull!

(Continued in Part II)

Gear and knowledge tips – lessons learned from tahr hunt


 Instead of running through all my stuff, and regurgitating all the things you already know, I will focus on a few items and experiences that I think are specifically pertinent for the conditions we were in.

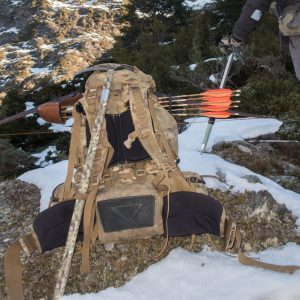
Ice axe

Odd place to start maybe, but the best piece of gear I took was my ice axe. I have one that is 100cm long from SMC Gear in Seattle (www.smcgear.com). If you are in Canada, the shipping cost is ridiculous, so if you can somehow finagle a different route than straight shipping, that’ll save you a lot of money.

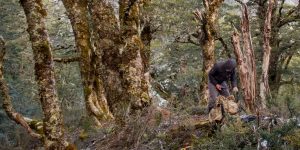
Even though I am a short guy at 5’8″, I really like the extra length for downhill work (you can always choke up on the handle for uphill if required). I also use it as a climbing aid for uphill, hooking it around tree trunks, limbs, rocks, etc. where normally you’d need both hands, but you can’t because you are holding on to the bow. You’ll have to try it for yourself if that works for you as well. I like it.

Of course the most important functionality of the ice axe that you hope you’ll never have to use is self-arrest if ever you start sliding. I’ve argued before how two wrist-strapped hiking poles will do you no good whatsoever in in a situation like that. Just don’t do it, especially on hard-packed snow or ice, but also not on the steep fern-covered slopes in New Zealand.

Crampons

Right behind the ice-axe come crampons. I used Kahtoola micro-spikes, the old ones, before they went all light-weight on us and made the rubber all flimsy. I lost them, likely during a fall in a creek bed, and I will forever regret that. Mine fit perfectly tight on my insulated boots, and I have navigated serious ice fields with them, as well as wet, overgrown rock, and other nastiness

I’ll be on the look-out for a replacement that is as sturdy as the old ones, I am not sure I can get myself to buy the lightweight version. If you have any experience with those, let me know.

If you end up hunting in conditions that are more severe than what we had, or you are up in the ice-covered bluffs more than we were, I’d recommend full crampons. We crossed a few ice-fields, where a very long slide would end in a collision with some big rocks, and you just need 100% grip. Don’t skimp on that. If you don’t have them, buy them, and use them. Don’t get anything that looks like you might use them on your driveway after a frost. You need aggressive spikes. I handled some lightweight full crampons in a store in Queenstown that I would have bought in a heartbeat if I hunted those mountains and conditions often.

Velcro

Disclaimer: I hate velcro.

The bush we whacked during some of our climbs, Bruce the guide labeled as moderate. Truthfully, the scrub that I saw down around sea level was way worse than what we faced, but I thought it was bad enough. So bad, that on the first outing my bottle holder, including water bottle, got ripped off my belt without my noticing it. That was a good lesson; my camera case found a place inside the pack, instead of being attached with velcro straps to the belt, where I normally carry it. My advice: don’t attach anything to your pack with velcro when negotiating the West Coast bush.

Avalanche knowledge

A good idea for anybody doing what we do in the high country, is an avalanche course. Of course you will be in the capable hands of a guide, but you could end up hunting, like we did, terrain that is new to you and your guide.There was obvious evidence of avalanche, where we hunted, that had reached only half way down, but a quick look at Google Earth shows very impressive avalanche run-outs all the way to the bottom, where the creeks join the main river. The West coast weather is fickle, and a dump of snow can change conditions overnight. Some knowledge about where you might be in the most danger could help keep you out of trouble. When in doubt, stay in the fringe country between the beech forest and the low-shrub zone, and stay out of the creek beds, which basically are just avalanche funnels.

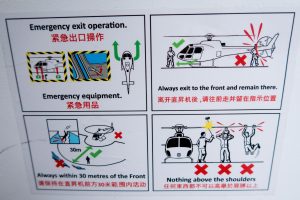
Heed the chopper egress routes

You really don’t want to stick you head into the path of the main or rear rotor. I don’t think anybody can make you look good for the casket after that.

And that’s it, my experiences and advice based on one (1) trip to a West Coast Wilderness Area on the South Island of New Zealand. Do with it what you want. Feel free to comment with any questions or remarks you might have, or contact me via the form.

Stuff I didn’t use on my last hunt

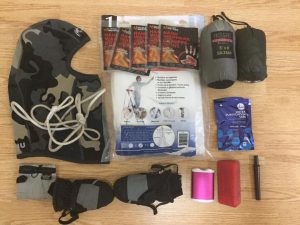
Every once in a while it is useful to take a look at all the stuff you took on a hunt, especially if you have to carry everything on your back, to see if there is anything you could leave at home next time, and lighten the load. Two weeks after returning from New Zealand, I sorted through my stuff with that goal in mind; here are the results.

Tyvek suit

We didn’t get any stalking opportunities that required the use of snow camo. We got lucky with the weather, and didn’t get any precipitation, and the tahr mostly hung out at middle altitudes where enough shrubs protruded though the ice and snow to make a full-white costume unnecessary. Two days after we choppered out, the area got blanketed by snow, and a snow suit could possibly have been an asset.

Siltarp/pack rain cover

Beautiful weather, I never needed either.

Water purification tablets

According to Bruce, my guide, the water was as clean as it gets, and we drank it without any unpleasant effects.

Handwarmers

I only used a set once, on other days the weather was nice enough to take the gloves off during the climbs and prevent the build-up of moisture that makes them so cold during glassing. 

Custom Bow Sling

AKA piece of rope. Although I used it lots during the goat hunt in BC, the bush here was such that it made more sense carrying the bow in hand, and in the alpine I strapped the bow across the top of the pack. 

Custom Limb Tip Protectors

AKA baby gloves connected by bungy cord. Though I figured this to be the cat’s meow, in BC it became clear very quickly that the system did not work in the alders. The New Zealand bush was such that I didn’t even try. I could have put them on in the alpine, but never did. The tips did scrape the rocks a little, mostly when navigating up and down creek beds, but a few dabs of wipe-on polyurethane took care of that once back home. They won’t be coming on the next trip.

Mini camp towel

I’m sure I’ll come up with a purpose for it, but on this trip I didn’t need it. 

Battery pack

I had two with me, I only used the one to give the iPhone a boost midway through the trip. 

Burner

I had planned to buy a gas canister so I would have my own set to make coffee without having to ask the guide, but forgot to get on in Queenstown before the hunt. It didn’t matter in the end, because we used Bruce’s Jetboil for everything, and there wasn’t much down time before or after actually cooking and eating breakfast or dinner. Still it was good to have in camp, in case the Jetboil would have given up the ghost. Making a fire would have been a chore, as most suitable wood was located half-way up the mountain.

Knife/broadhead sharpener

Never needed it.

Balaclava

Just not cold enough. I did use a merino buff to keep the cold wind off occasionally.

Other Clothing

As this trip was supposed to be two days longer than it turned out to be, I had an extra set of long merino base layer with me that I didn’t use.

Conclusion

There is not much from this list that I would leave at home next time. Guess I have my gear list tuned pretty well. That said, some of my stuff could definitely be lighter. I’ll be working on that as time goes by.

String walking or fixed-crawl for hunting?


Traditional bows are not known for producing blistering arrow speeds. Shooting at anything beyond 20 or 25 yards creates a beautifully arched trajectory that we can follow with our yes. One of the reasons I love shooting a longbow. It does however create a dilemma. Not for those fortunate few that can just look at target, pull back without thought, let one rip and hit the ten-ring, regardless of distance; but for those without that talent, the aimers and gap-shooters. At close distances we generally need to aim pretty low to get good center hits; so low sometimes that the connection with the animal is lost and it becomes awkward and difficult, resulting in poor shots.

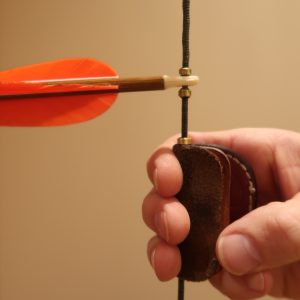
Enter string walking. String walking is a method of shooting and aiming that creates smaller gaps at the shorter distances. By sliding your string hand down the string, grabbing it s short distance below the nocking point, at full draw the arrow will be closer to your eye. The change in perspective makes that you can aim closer to the animal or target. At longer distances, you go back to the traditional method, where you grab the string immediately below the nocking point (string walking usually means you are shooting “three-under”). When you create one defined point where you grab the string at shorter distances, it is also referred to as a “fixed crawl”.

The guys at The Push Archery created a movie a few years back that explains all this in detail: The Push – A Traditional Archery Film

Sounds good? Sounded good to me when I first learned of it. Who wouldn’t want to have the best of both worlds: aiming point close to the point of impact at all distances. But wait; all distances? Just how far are we shooting in hunting situations anyway, and does this approach really have practical value?

Lets examine. I have read claims of archers whose “point-on” (the distance where the point of the arrow at full-draw covers the point of impact) is 50 yards or so. This has to be a result of one of two, or a combination of two things: a high-poundage bow, and a light-weight arrow.  From a hunting perspective a point-on this far makes little sense to me.

How many of us can consistent hit the ten or nine ring at 50 yards? How realistic is it to expect that you can hit a whitetail deer consistently at 50 yards, when your arrow speed is such that it has time to hear your string drop, locate the source of the sound, look you in the eye, do a pirouette, flip you the middle hoof, and duck down, all before your arrow gets there?

I’ll pause here and say that the above is based on my own limited view of the world, and for every generality postulated above, there will be plenty of exceptions. However, most people probably have no business shooting at an animal beyond 30 yards with a longbow or recurve. Accepting that as fact, I really see no need for string walking or setting up a fixed crawl.

The solution: shoot a heavier arrow. Why inconvenience yourself with large gaps at short distances, for the idea of having a flatter trajectory out to distances at which you will never shoot during hunting? Find your maximum distance (and for most that will not be 40 or 50 yards), and build an arrow with a “point-on” around that. Obviously your arrow will drop quickly after your point-on distance, but practically you will still have another few yards where you can keep the aim on hair (depending on the size of the critter), and for closer shots your gaps will be a lot smaller. You won’t have to remember to grab your string lower (I am sure I would mess that up in the heat of the moment), and you can create a better-penetrating arrow: higher arrow weight, and more opportunity to put more weight towards the front. All advantages for a hunting set-up.

That was my approach anyway, once I realized that shooting at 40 yards or more was not for me (yet?). I’m getting to the point where I’m getting consistent out to 30-35 yards, and I built my arrow around that.*

Disclaimer: This is just one guy’s opinion, and in my small world it all makes sense. Feel free to tell me I have it all wrong in the comments. I am here to learn and get better, and have fun doing it.

*since I wrote about my arrow set-up my technique has changed a bit, and my point-on increased to just below 30 yards.