Fourteen years of mountain hunting or the unfortunate accumulation of “stuff”.

In 2003 I came to the Rockies with a dream of sheep hunting burning in my soul. My gear was typical of a Western European forest tree stand hunter. Heavy boots, thick sweaters and jackets, a 9 ½ pound rifle. I quickly bought a hefty sleeping bag, a foam mat, a $150 backpack, a billy pot, a diminutive propane burner, and I was off to the mountains.

Ignoring for a moment that first year when I had to learn the hard way that a little hill in the Belgium Ardennes was poor preparation for the East Slopes of the Rockies, that gear was pretty much all I needed to survive. Cotton clothing, army surplus for the most part, must have kept me wet and cold sitting on a high ridge after a big climb, but heck, I was sheep hunting! My day pack contained some raingear, salami, cheese, nuts and Snicker bars for lunch, knife, moleskin and tape to deal with the blisters. Map and compass too, I reckon. An overnight pack had the big heavy sleeping bag, foamy, tarp (not the fancy kind) and the cooking gear. My most expensive piece of gear was my binoculars, a pair of Swarovski SLC 10×42.

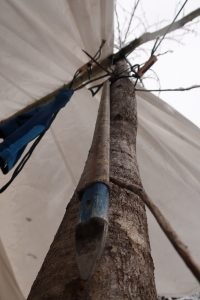
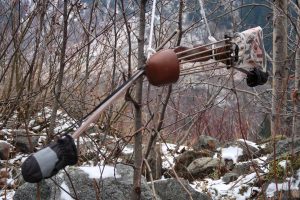
I have lost many photos of those first few years unfortunately, but I managed to recover a few low-res images from forgotten sources. Here are two examples of frugal camps. I was tougher than I was smart, and “hunting” consisted mostly of long hard treks, with the odd half hour of glassing thrown in here and there. I wish someone back then had steered all that energy in the right direction, but I hunted mostly solo and had to make all the mistakes myself; many times over.
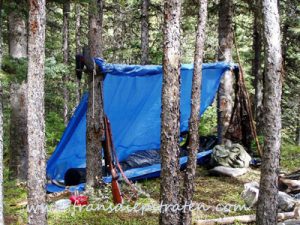
My first sheep camp. Pretty nifty set up until the snow started flying
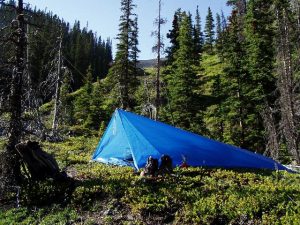


Scouting for sheep, surrounded by promising basins. Mice chewed the fingers out of my deerskin gloves that night

Fast forward 14 years. Looking over all the gear I took mountain goat hunting, scattered across my basement room, I can’t help but wonder what Fred or Jack would have said, had they been able to see my collection of stuff and gadgets.

Over the years I improved many components to my “kit”. The first to go was the tarp. A lightweight one-person tent provided a bit more shelter, later replaced by a two-person because the one-person was a bit tight and claustrophobic, and I needed room to keep the dog and gear out of the rain (never had that problem with a tarp).

I probably spent several times more on that set of lightweight rain gear than the worth of all my old clothing put together. It replaced a heavier set of big-name-retail rain gear that had the unhappy habit of sucking water into the cuffs and transferring that to the liner, causing me to be wet from the elbows and knees down.

The Exped 7 Downmat was a life saver. An aging back no longer enjoyed a half-inch thick foamy, so for probably 25 times the cost, I bought comfort. Of course the heavy sleeping bag had not been a smart purchase, and it was replaced by a much lighter, and more compressible down bag. Through winning a Rokslide (www.rokslide.com) push-up contest (old-man category) I added another bag, a synthetic minus-something bag for the really cold days (and most my days are really cold, as I seem to be one of those guys that can’t seem to stay warm at night). 

After years of enduring the agony of a cheap backpack, I finally broke out the checkbook and bought what was probably the last Kifaru Timberline before they went to the detachable frame. A daypack was added through winning a photo contest (I get lucky sometimes, I also won a Sitka Kelvin jacket through an instagram photo contest).

Then came 2013, and a coveted late season draw tag for bighorn sheep. Now I really started piling on the gear, from merino base layers, to expensive insulated pants, gloves, pac boots, and much more in order to be ready to fight the -30 temperatures and gale-force winds.

Of course there was a new lightweight rifle, because no sheephunter should carry a 9 ½ lb set up; a new bow after the sight on my old hand-me-down finally broke; a satellite messenger for the home front, and then another one that allows sending texts, and battery packs to keep those and the paired cell phone powered up, a folding knife with replaceable scalpel blades, too many fixed-blade knives (I have a problem), fancy high-speed water boiler, better this, more of that. There is no end.

I know there is no going back on some things. The comfort of a good sleeping pad I will not forego. Some clothing is so much better than the stuff I had fifteen years ago, that I can’t see myself going back to cotton t-shirts and jeans. I knew the very moment that I purchased a SPOT messenger that that genie would never go back into the bottle. I get daily crap from my family for not taking my cell phone when I walk the dogs and stay out longer than expected. Not taking the Inreach on multi-day trips would rank up there with the other mortal sins.

Recently I have been taken my old billy pot out for hikes again. Despite washing it, the pungent smell of the many campfires never quite comes off, like it is fused into the metal. It holds a little bit of each of those early mountain hunts, when I was low on experience, but high on enthusiasm, and energy was in unlimited supply. I think I will go have a good hard look at my gear, and figure out how I can simplify it a bit.
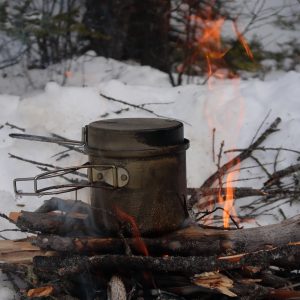
A campfire and an old billy pot – nostalgia over efficiency and speed

That foldable scalpel blade, I think I will start with that one. It’s not a real knife anyway. Besides, I just got a fancy custom knife that looks better with the new longbow.

What is your one piece of gear that you won’t go without? And what might you leave at home this year?


BC Goat Hunt – Gear Review and Physical Prep

The goat hunt is more than a week behind us and the ragged edge of disappointment has dulled a little. Time to provide some perspective on gear and the physical preparation.

Gear

None of our personal gear let us down, nothing really failed (not counting the cheap rubbery rain gear I bought to use during the boat and quad rides; I considered it disposable, and disposed of it got, it lasted the four days that I needed it).

Though we got a daily soaking fighting through the wet alders, we didn’t get rained on incessantly, as we had feared. It was a little colder than expected so most precipitation fell in the form of snow. The day I shot the billy was a day of constant drizzle. I used an older set of KUIU Chugach rain gear with a good soaking of a spray-on DWR just before departure, and it performed fine.

For base layers I used Icebreaker merino. 200-weight shirt and long johns and a 260-weight shirt over top of that. On days that were wet and close to freezing, a rain jacket to keep the wet and wind off was sufficient while climbing. A neck gaiter (KUIU) and a hooded jacket (Sitka Jetstream) kept the cold from creeping in from above when glassing. For prolonged periods of glassing I would put on Sitka Kelvin puffy pants and jacket.

I would definitely recommend hunting pants with knee pads. I used Sitka’s Mountain Pants. I slipped in the rocks one day, and fell onto my knee hard. The knee pad made this an event without consequence. Just for that reason, I’d wear a garment like that. But the knee pads also help when crawling over downed trees, up rocks, and other obstacles that are just too high to get a foot on them.

I used insulated boots, Lowa’s Tibet GTX Superwarm. Despite the fact that the leather got thoroughly soaked, my feet stayed mostly dry, and fairly comfortable. Some swear by more rigid boots for this type of country, but I found these to be a good middle-ground, being suitable both for the long approaches and the climbing in the rocks.

Gloves are always a big concern, since my hands get cold easily. I purchased Columbia Powder Keg skiing gloves. Guaranteed waterproof. Not sure if that was the case, the gloves got pretty wet on the inside. Could have been sweat, and ingress from the top. The good thing was that they stayed warm even when wet. However, they were hard to dry by the stove, by morning they were still damp.

After long deliberations, I left my 5 1/2 foot aspen hiking pole at home, and brought a 100cm SMC Gear Capra Ice Axe. A disadvantage is that it is loud when banged on rocks, but a big advantage is that it becomes an extended arm during climbs, and of course it might save your life if you start sliding, in a way that no trekking pole can accomplish.


Carrying the longbow through the alders was a major nuisance. I couldn’t strap it to the pack or it would get me stuck every second step, so I had to carry it by hand and feed it through the shintangle. Whenever the terrain got rocky I’d rather have the bow strapped, so I could maintain a balance using two hands. Crossing smaller rock slides I felt unstable, and of course managed to slip and bang up my shins. I really missed my long pole, but I would not have been able to carry it up some of the stuff we climbed.

I fabricated a sling from a piece of nylon rope, which, in lesser terrain, would have worked perfectly. The system I came up with to protect the tips while still having quick access to the bow needs some work. The “prototype” consisted of two baby mitts connected by bungie cord. The tip that would lead the way when fighting the alders was well-protected,, but the rear mitt got pulled off constantly. The next model would have to incorporate a non-stretchy connection between the two tip protectors, or something using snap caps. Maybe there are tip protectors commercially available, I must admit that I never looked. In the end, the bow only sustained minor scratches, though I did manage to ruin a string when I fell and it caught on a sharp rock.

In this country and this weather you will need something to protect the feathers on your arrows. I found a small dry bag that just fit over them, which kept most of the moisture off and kept damage during bushwhacking to a minimum. Similar to the mitt though, branches will want to rip it off, so make sure it is attached well.

Physical Preparation

It is hard to give advice on this, as everybody’s physique is different, and everybody’s starting point and opportunities to train are different.

Sitting behind a desk all day is not the best preparation for a multi-day hunt in goat country, or any kind of hunt really that doesn’t involve a tree stand or ground blind, but it is what I do for a living.  Despite that, I try to stay fit year-round, just to have some sort of base level. I live in the happy circumstance that I live near a hill, and a fairly steep creek canyon, so I can get some base-training in just walking the dogs.

A few months before the hunt I started focusing on prolonged periods of daily work-outs, without getting too extreme on any individual day. The body is aging, and I found that extremes of anything increase the chances of injury. For me, and you will have to figure out if that also applies to you, daily work-outs, with very few exceptions, are the key. Focus on cardio, with added weights if you can.

If you can run (meaning you don’t have any injuries that prevent it), hill running is an excellent way to train legs and cardio, provided you have hills (or stairs). Hiking up and down hill (or stairs) with a weighted pack is very useful too (I would call it essential), just be careful with the knees. Add some push-ups, pull-ups and core, and you’ll have a good start. Mix things up, run or hike on uneven ground if you can, do side-hills, pick up and put down heavier, awkward things, and so on. There are many online resources to help you pick the exercises that feel right for you.

The last week or two before the hunt I picked out the steepest slope I could find close to home and went up and down, and up and down, with light or no weight. On the weekends I added in longer hikes, which would give me a few hours of continuous climbing, again with limited weight. A shoulder problem prevented me from doing any kind of serious upper body weight work, even the amount of bow shooting had to be moderated. It was not ideal, but it was what I could do.

I could definitely have been in better shape, but I feel I was adequately prepared, nobody had to wait for me. By day 6 I was feeling the strain, but this was likely partially caused by the deception of losing the billy. For the next hunt I wouldn’t change much. Focus on daily climbing for a long period of time (I probably didn’t skip a day for two months), and add in whatever keep things fun. I will work on upper-body strength though, and core, so I might actually be able to pick up and carry a moose quarter next fall. Who am I kidding, I’ll settle for being able to stumble back to camp with a quarter in my pack, I’m going to need help to get it in my pack and get to my feet.

One last comment on shooting: as much as you can, get away from formal-stance shooting across flat ground. I don’t think I saw any piece of ground where a nice standing horizontal shot would have been possible. Shoot from the knees, from two knees, shoot up, shoot down, from behind cover, standing on a slippery sloped surface, and so forth. Even though I never got to draw the bow during the hunt, trust me on this one. You won’t regret it.

Questions

I just picked a few topics to comment on that I thought would be of interest. If you have any specific question regarding gear or training, just email me. If you have any tips or tricks for mountain hunting with a trad bow that are worth sharing, please comment below.

FD


Testing the arrow set-up

Hunting season is here!

Targets have been worn out, cardboard animals pierced and punctured so many times that parts had to be replaced. Magnificent shots have been made, hitting tennis balls, pieces of string, stumps, and imaginary hearts on bear-shaped bushes. Unfortunately various slumps have weighed heavy on the mind, and the realization that a poor shot is just a half-second of inattentiveness away keeps me on edge.

And then there is the experience that the one gopher didn’t immediately die from being hit with a judo point. A gopher. Weighing less than a pound. What am I doing, thinking I can kill a deer, or maybe even an elk?

Time to put the worries to bed. My old chest freezer finally wore out, and we were left with a few pieces of thawing, freezer-burned pork ribs that would make a perfect medium to try out my bow and arrow set-up.

To recap, I shoot a Stalker Stickbows Jackal longbow, set at 47 lbs, and Easton Axis Traditional arrows, 400 spine, RMS Cutthroat 250 grs broadheads, for a total arrow weight of about 558 grs.

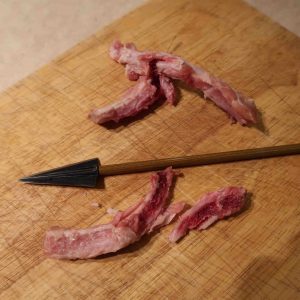
I shot at the double-stacked racks of ribs from 20 yards, and at a single rack at 30. Here is a ten second video of the 20-yard shot: Arrow vs. Spare Ribs

In the photo, the top ribs came from the double stack, the bottom is a rib from the single stack.


I hit ribs in both racks on the 20 yard shot. The broadhead cut through both (about half-width, as both were a glancing hit), and plowed on deep into the block material, as the video shows. On the 30 yard shot I hit a rib full-on and split it apart. The arrow hit a stack of heavy cardboard that I had used to patch up the center of the block, and that stopped the arrow pretty fast.

Although there was little science bothering my testing approach, and repeatability of the test can only be achieved by happenstance, it did show that my set-up has some power. Two stacks of ribs were no match for it at 20 yards, and even at 30 yards it still has enough power to split ribs.

I will go into the field a little more confident now. I hope everybody has a wonderful season, bringing home lots of great experiences, and hopefully filling a freezer. And maybe at the end of year you will hang some antlers or horns in your den as well.

Be safe!

The New Bow

It arrived a few weeks ago! And it is beautiful!

There are so many talented bowyers out there, that it is hard to figure out which one to trust with your money. And if you are open to purchasing a factory bow, the options are even more staggering. Major manufacturers such as Hoyt (http://hoyt.com/) make traditional bows (with modern materials) that have proven their worth in the field. Often they use the ILF system to attach limbs to the riser, meaning that you can use other manufacturers’ limbs that use the same system if you wanted to. Usually you can add gimmicks and gadgets that help in tuning and bow performance. To me, they just did not have the allure of a custom bow, made of wood and veneers and, yes, modern materials too.

I don’t recall when I first heard of Stalker Stickbows (www.stalkerstickbows.com). I rather liked the lines of his bows, and started checking out the various forums to see if I could find out more about them. The most important finding was the absence of one: no negative reports. I subsequently won one of South Cox’ DVDs (South is the craftsman behind Stalker Stickbows) in a draw which included a section on how the bows are made, and that sealed the deal.

True to my obsessive nature I fretted about every detail, but finally just picked up the phone and placed the order. I decided on Claro Walnut on the back and belly of the riser and Calro Walnut veneers on the back of the limbs. Myrtle constitutes the core of the riser and the belly of the limbs. Since I didn’t like the white spacers that South often uses in his standard offering (he’s got much better looking ones for an added cost) I opted for blood wood, which I think is both fitting (for a hunting bow) and beautiful.

Stay tuned for more on how this beauty and I get along.

Building a longbow – Part III

After most of the contour shaping was done, and the limb tips sanded to shape, it was time to put some backing on. As indicated earlier, there are all sorts of prettier options than the fiberglass cloth that I used, but it was functional. The process is straightforward: mix up some epoxy, put a thin layer on the back of the bow, gently press the fiberglass cloth into the epoxy, making sure that there are no air pockets or dry spots. Slightly heating up the epoxy helps spreading it. I used the microwave. Microwave it too long, and your mixtures turns into an unworkable glob of goo. How long is too long? You’ll find out when it happens, but start with seconds. The aim is to heat is some so it flows better.

I ended up using three layers of cloth, paranoid as I was about heaving the bow break on me. A final layer of just epoxy was on to create a surface that I could sand without cutting into the cloth.  For esthetic purposes I also covered the limb tips, although it really has no purpose of strengthening any thing there. After cutting away the excess cloth, a few passes on the oscillating drum sander were enough the provide clean edges all around, using a small diameter drum for the riser section.

With all this done, it was ready to start the “tillering”. Basically this means that you remove material from the belly of the limbs so you can bend them by pulling on the string. I put together a so-called Flemish string from wire used to tie roasts in the kitchen, and I totally forgot how that process works. I have read people using things as simple as parachute cord. My solution lasted just about as long as it took to get through the process and then it broke.

Next you need a tillering tree. There are many how-to’s on Youtube for that. A picture is worth a few thousand words in this case. It is nothing more than a contraption onto which you can rest the bow-to-be, belly down, and a series of notches from about 6″ to at least your draw length, or a few inches more. The notches shown on mind may be a lot deeper than they really need to be. I just felt it was important to get them lined up underneath the center of the bow.

Put the bow on top, back towards the ceiling, string dangling down. Grab the string with two hands, and pull down, hooking the string under the first notch. If you can’t bend the limbs that much, they are too bulky. Start to remove material from the belly of the bow until they bend enough to allow you to hook the string. Step back and observe the bend in the limbs. Are they the same? Are there weak spots where the limb bends stronger? Or spots where they limbs just won’t bend as much? Mark the locations where you think you need to remove material to create a nice even bend across the limb. Don’t work on the weaker spots, work on the strong sections. Repeat. Don’t progress to the next notch until you are happy with the curve in both limbs. Work your way all the way down to your draw length, and go easy. You cannot put back material that you removed.

I have seen much better designs than this one, with tillering trees attached to the wall and the use of pulleys and rope to make the limb bends while you observe from a distance. That set-up also allows you to hook up a scale so yo can monitor draw weight. An alternative method, much less convenient, is to take your tillering tree and bow, put it on a bathroom scale, and watch the display while you pull and hold at the desired length. Does it work? Yes. Is it convenient and easy? Not really.

Having an uncluttered background helps you gauge the bend in the limb. I used a piece of cardboard, with horizontal lines of masking tape. As you can see here, the overall bend is the same in both limbs (the tips go down the same distance on both sides), but the lower one (left) doesn’t bend as “round”. I had to work that limb to create a curve more similar to the top limb.

Shown here is the bow nearing completion, but still drawing more weight than I was comfortable with. Some more sanding on the belly off the limbs, and back and forth to the tillering tree, always keeping an eye on obtaining a nice even bend through the limbs.

Once I was happy with the way the limbs bent, and a few test shots were made, I stained the wood, and put on five or six coats of a rub-on poly-urethane finish. Here is a short video of some backyard testing.

https://www.youtube.com/watch?v=Z53ZflQqqgY

It turned out that the shelf was not to my liking, the arrows rolled off too easily, and I wanted the high-point to be closer to the deepest part of the grip.  After that, it was a matter of refinishing, buying a real string (nope I didn’t make one myself), and learning how to shoot.

This was a very rewarding project. It took a fair amount of time. It can be done with nothing but hand tools, but a few well-chosen power tools will make the job a lot easier. I have been severely tempted to take this bow on a hunt, but after shooting my new longbow that was made by a professional I realize that, despite the legal draw weight, I’d be better off with something a little more powerful. More on that later. Feel free to leave a comment or use the contact page if you have any questions.

Building a longbow – Part II

The first step is the selection of a piece of wood that is suitable. Remember that when you carve a bow from a tree you are working to create a surface that follows a single growth ring. Unfortunately, when they cut planks at the saw mill, they don’t care too much about growth rings. When you look at a board, you will see that the rings run all over, and especially off the side. Once you start bending the wood, the spots where the rings run off the back of the bow (the surface facing away from you when you hold it out in front of you) will be the weak spots. The belly of the bow (the surface facing you) is not critical as there is much less stress on the wood on that side. Ideally you will find a plank from which you can cut out the profile of the bow without any rings running off the side. Good luck finding one.

I found a maple plank that came close without the cigar. So in order to minimize the risk of the bow breaking, I decided to “back” the bow. Basically this entail gluing a material on the back of the bow that will largely prevent it breaking when bent. You can use all sorts of materials for that. Snake skin is popular, animal sinew if you want be go ‘traditional’, but also paper or cloth will work. I went with what I knew, and used some hardware store fiberglass cloth. Not a pretty choice, but it will do the job. In order to build up the handle (riser) I choose a piece of birch, just to get some contrast. This piece has no function other than to provide some bulk in the grip area.

Next was the drawing of the profile of the bow onto the plank. Tip: make sure you clearly mark the center line of the bow, as this becomes important when you start shaping the limbs. I decided to cut out a shelf (place to rest the arrow when drawing and shooting), and shaped the riser by copying what I saw on bowyers’ websites. At this point it was still mostly hand tools. Cutting along the grain with a hand saw is a lot of work, if you have a bandsaw or a table saw, this can go a lot quicker.

I then rough-shaped the birch piece to match the maple and epoxied the two together. It is more efficient if you change the order, and first glue the pieces and then do the shaping, especially if you will be using power tools. By the way, I used EA-40, a two-part epoxy that has good strength under physical stress, such as bending. (https://www.smooth-on.com/products/ea-40/)

At this point I also glued on small pieces of birch on what would become the limb tips, for reinforcement. Tip overlays these are called, by
those who know what they are doing. I used a light with a non-energy efficient incandescent bulb to provides heat, which helps the setting of the epoxy.

After this I spent some time on the least critical part of the bow, the riser, and shaped it with files and course sand paper to fit my hand. The edges of the limbs were also cleaned up, rendering a piece of wood that began to resemble the outline of a bow, with the rigidity of a walking stick.

This was as far as hand tools brought me. I borrowed an oscillating drum sander, and from here on in, a lot less elbow grease for going to be used. Shaping the tips and cutting the slots for the string were the final steps in this stage.

The bow-to-be was now ready for backing, before starting to trim down the limbs so they could be bent, in a process called tillering.


Building a longbow – Part I

Sometimes it takes misfortune to create the circumstances that allow the germination of something good. Like the cone of the jack pine will not release it seeds until a fire rages, it took a time-out in my working life to create the right circumstances for the next step into traditional archery. I mean, how many hours a day can you really be looking for a job. I was in dire need of a keep-sane project, and building a bow seemed like the right combination of manual labour and research into the how-to. Here is the story of the build.

The most “traditional” bow that you can build is the one you chisel out of the trunk of a tree. It takes the right tree, with the right characteristics,  cut into the right pieces and then dried over time to make it suitable as bow starting material. In a nutshell, and without any deep knowledge on the matter, you need to shave down your piece of tree trunk following a single growth ring, across the length of your bow. A tree has growth rings that sit like cylinders in its trunk. If you have a pie-shaped 6-foot long piece, you can remove enough material from the outside and inside to create a stave. This can then be meticulously whittled down, making sure you do not cut through the chosen growth ring on the outside (the inside is less critical). The growth ring somehow provide the strength needed to withstand the bending that will be required to launch an arrow. If you cut through a growth ring, you create a weak spot in the limb. That is why some selfbows that are teased out of a tree have wonky shapes. A tree is a natural thing, and doesn’t always grow exactly as we would like. To be honest, this project looked like it required skill, and of course a well-dried piece of tree. I had neither, so that option was out. If you are interested though, here is the first of a series of four videos that takes you through the process: https://www.youtube.com/watch?v=d_bJe4CYo-A

It is something that I still hope to do some day.

On the other end of the spectrum of traditional bow building lies the recurve (or longbow) built with a combination of mostly modern materials and wood. Basically you shape a riser (the handle part), and you laminate wood and fiberglass strips for the limbs and the riser all together by using epoxy, pressure and heat. Rather tool-intensive, requiring skill and knowledge, and unless you have some recipes about how thick wood or how many layers of glass to use, a bit of a gamble what the draw weight of the bow will be. Definitely an interesting process, but too big of a project for me.

I came across some out-of-the-ordinary options such as building a bow out of PVC piping. With full respect to the ingenuity behind the PVC bow, the end product is not too pretty. Not my thing.

Luckily there were plenty of Youtube videos about building a bow from lumber yard planks. A saw, some rasps, files and sand paper, epoxy, and lots of elbow grease. Low cost. That would be my project. The next two or three posts will take you through the process.

Building the arrow

Gone are the days where I could walk into a bow shop, tell them my draw weight and length, and they’d whip me up a dozen arrows in no time. As an unsophisticated compound shooter, that was all I needed. Mind you I am not saying that all compound shooters are unsophisticated, just that I was not too educated, and very willing to accept whatever the guy behind the counter told me I needed. It didn’t always look perfect to me, but it did the trick.

That approach might not work with a traditional bow. The shape of the riser and shelf (if you have one), the efficiency of the bow (how well does draw weight translate into limb speed and therefore force on the arrow, point weight (tradbow hunters tend to favour heavier weights up front than most standard spine charts take into account), and so forth, all influence what the right arrow is for your bow.

Some bow shop staff are knowledgeable and experienced with tradbows, I ran across one who nailed the spine just right for my selfbow, others enter terra incognita as soon as the bow does not have wheels, or the tip weight is not 100 grains.

When I say “arrow building” that sounds a lot more involved than it is. It’s not like I am finding natural materials, wood and feathers, and tendon and pine pitch, and putting them all together, like in the old days, and I’m not even buying blank shafts and fletching my own (for now). When I say “building” I mean figuring out spine, selecting a broadhead, thinking about tip weight versus arrow weight, front-of-centre (FOC), length, etcetera.

After a lot of agonizing, reading, and searching, having collected enough, sometimes contradicting information to make my head spin, I had an epiphany. I asked myself the question: “What are you going to be using this arrow for?” and another one: “How far do you actually think you will be able to accurately shoot come hunting season?”

The second question answered the first. Hunting. Killing an animal. Deer-sized and up, not excluding elk and moose. And the second question wasn’t too hard to answer either. I got fairly proficient at 20 yards with my selfbow, but never shot much beyond that. So I figured that if I’d be able to shoot decent out to 30 yards by fall, I’d be one happy camper. If I could build an arrow that would allow me to aim on the animal (I tried instinctive for two year, it wasn’t pretty), I figured I would be in business. An arrow that heavy would also negate any issues with having to aim ridiculously low on animals at closer ranges or coming up with a string-walking plan (moving your arrow nock down on the string, to use for close up shots), an approach that in my case would certainly lead to picking the wrong nock in the heat of the moment.

Since my bow is fairly light, I probably draw about 48#, in order to kill an animal a big as a moose, I would need to stack the odds in my favour and pile on penetration-enhancing factors as much as I could. That meant a heavier arrow, higher FOC, a broadhead that will not bend or fall apart, and a smaller-diameter arrow. None of this “knowledge” comes from experience, just “stuff” I read, and that seemed to make sense.

Without some sort of reference, I would still have been in the dark about where to start. How heavy an arrow would give me the desired trajectory? Luckily I had two arrows left from my selfbow set-up. 550 grains in weight, with 150 grains tip and 100 grs brass insert, 29″ long, 500 spine. These gave me approximately a point-on of 25 yards, and at 30 yards, a hold right around a deer’s back would centre-punch it.

The problem was that the 500-spine arrows showed a bit weak (fletching visibly kicking left in flight). So I used the 3RiversArchery spine calculator to look at some alternatives (http://www.3riversarchery.com/dynamic-spine-arrow-calculator-from-3rivers-archery.html). In this online tool you enter some bow characteristics to calculate a dynamic spine number, and then you select from a big library of arrows which one you might want to try. By manipulating spine, length, tip and insert weight, nock weight and fletching type, you need to try to match the number calculated for the bow as closely as possible.

Since I wanted a smaller diameter arrow, I chose the Easton Axis Traditional, which uses 16 grs inserts. I wanted lots of weight up front, in a broadhead that is milled out of a single piece of steel, as pointy as feasible with the weight, and ended up selecting the Rocky Mountain Specialty Gear Cutthroat broadhead in 250 grains (http://www.rmsgear.com/cutthroat-cutthroat-screw-in.html). I started out with “standard” 3×5″ feather fletching, right helical, and a simple plastic nock. Manipulating the tool showed that I needed a 400-spine arrow at a little under 28″, to make the numbers match.

This would give me an arrow of 555 grs, a calculated arrow velocity of 168 fps, and a little over 22% FOC.

Fast forward a month or so: the arrow paper-tuned at 28″ (there is room for operator error in that observation, a topic for another blog post), weighed in at 558 grs, and chronographed at 160 fps. It indeed has a point-on of 25 yards, and at 30, if I point it at the back of a (foam) deer, it punches a hole right in the middle.

So far the the sun is shining in my arrow world. Soon the broadheads well come out, and one arrow will be sacrificed to bare-shaft tuning. Hopefully I will still be happy after that.

Speed kills! Right?

Traditional archers generally shoot heavier arrows than compound archers. Traditionalists tend to not speak about arrow speeds, and may have never chronographed their projectiles. However, the average compound bow commercial boast about the feet-per-second that can be achieved. Apparently arrow speed is important; or is it?

From the perspective of a relative beginner the amount of information that can be unearthed with a simple internet search is staggering. Unfortunately any click on an online forum or Facebook group yields the all-too-common contradicting statements. And while getting it right is important for competitive endeavours on the archery or 3D range, getting it right for hunting can be the difference between life and death, or worse.

As always, when the problem looks overwhelmingly complicated, breaking it down into smaller questions can help. Let’s ‘break it down’.

Accuracy

“A heavy arrow/faster bow/insert-any-discussion-topic-here doesn’t mean a hill of beans if you can’t hit them where it counts!” is a very popular, and true, one-liner that pops up in most discussions. That statement hides two aspects: performance of the bow-arrow combination and ability of the shooter. Since obviously we can all challenge Robin Hood to a shooting match and win, let’s focus on the equipment. Given a certain bow and a certain distance, and Howard-Hill-like abilities, is a lighter, faster arrow inherently more accurate than a slower, heavier arrow?

The consensus seems to be “no”; overall weight doesn’t seem to have an influence on accuracy in ideal conditions. Some say that heavier arrows are “more forgiving”, which supposedly means it responds less frantically to shooter error. I am not experienced enough to judge that claim. However, two factors enter the equation in hunting conditions. One is wind. The heavier arrow is accredited with better wind-bucking characteristics, more prone to stay close to the intended path. Where I live and hunt (bald-ass prairies, and high mountain ridges), that could become a major factor.

Trajectory

The second factor is trajectory, not an issue if we have flawless ranging and aiming abilities, but important for those mortals who may occasionally have trouble calling it 22, 26, or 31 steps to a deer. The lighter, faster arrow has a flatter trajectory in the near to medium ranges, our hunting ranges, and therefore is less likely to punish the shooter for ranging errors. With heavier arrows, and draw weights at the lighter end of the spectrum, estimating the range correctly becomes critical especially on longer shots.

Penetration

So why would you consider a heavier arrow, if you lose out on a flatter flight? Here is where the fun starts, and the topics of contention is arrow penetration. In the blue corner we have those that feel the need for speed. “Speed kills” says a compound bow commercial. In the red corner we have those that live by big brass inserts, and point weights in the hundreds of grains. Traditional archers don’t care about arrow speed, right? Let the bout commence.

Round 1: Kinetic Energy

At the risk of boring you to death, here is the formula for calculating kinetic energy once more, you have probably seen it a hundred times:

Kinetic Energy = 1/2 x m x v2

The weight* of the arrow is in there (m) multiplied by the square of the arrow speed (v). Speed makes the biggest contribution. The faster you can push the arrow, the more energy you have flying through the air. Since from a bow of a given draw weight the heavier arrow will go slower than the lighter arrow, this round goes to the lighter arrow.

* If you want to get really particular, the formula asks for the mass of the arrow. For this purpose the weight is an acceptable substitute. Check here for some very basic explanations about the difference: http://www.physlink.com/education/askexperts/ae321.cfm

Round 2: Momentum

More formulas:

M = m x v

Momentum equals the product of arrow weight and speed. So from a bow with a given draw weight, the heavy arrow goes slower, and the light arrow faster, but which has the advantage? Using 3Rivers Archery’s spine calculator (http://www.3riversarchery.com/dynamic-spine-arrow-calculator-from-3rivers-archery.html), which also estimates arrow speed, we can plunk in some numbers to see who wins.

Using a generic 50# recurve at 28″ draw weight as our weapon, how do the following two properly-spined set-ups perform (theoretically)?

Carbon Express Heritage 90 – 29″ – 125 grs tip – 10 grs insert

Total arrow weight 420 grs: calculated arrow speed is 200 fps

Carbon Express Heritage 350 – 29.25″ – 200 grs tip – 100 grs insert

Total arrow weight 663 grs: calculated arrow speed is 160 fps.

A quick session with the calculator shows that the momentum of the lighter arrow is about 21% lower than that of the heavier arrow (and coincidentally, the kinetic energy is roughly equal).

So why is momentum important again? One of the many online dictionaries says it nicely. Momentum is “the property or tendency of a moving object to continue moving”. And that is what we want from an arrow, keep moving into and preferably through the animal’s body. A heavier arrow, with the same kinetic energy, does that better than a light arrow.

Round 3: FOC

FOC stands for Forward Of Centre. Usually expressed as a percentage, it is a measure of how much weight of the arrow sits forward of the balancing point of the arrow. The formulas are getting more complicated:

%FOC = 100 x  (A – L/2) / L

A is the distance from the low-point on the nock to the balance point of the arrow (where it sits in equilibrium on a sharp-edged object) and L is the total arrow length from the nock to the edge of the insert. There are more than a few sites that explain this in detail and even provide a calculator, here is one: http://www.grizzlystik.com/Calculating-Forward-of-Center-FOC.aspx

FOC is worthy of consideration because it is one of the most important parameters that influences penetration, according to Dr. Ashby (http://www.alaskabowhunting.com/PR/ATA_Handout_Text_Web.pdf). This discussion can become way too technical quickly. An arrow is a pretty flexible projectile, and the more mass sits towards the back of the arrow, the more awkward the moment of impact becomes. Mass towards the back end can push the arrow out of its path of perfect flight, negatively influencing penetration. If you have a lot of time and interest, you should try reading some of Ashby’s findings that results from years of studying and field testing (http://www.grizzlystik.com/Dr.-Ed-Ashby-W26.aspx).

All of this is relevant to our discussion on arrow weight because a higher percentage FOC is easier to achieve with a heavier arrow; a heavier arrow that is achieved mostly by increasing the point weight. Heavy tips and brass inserts help putting together an arrow that is “tip heavy”, and therefore has a high FOC.

Round 3 goes to the heavier arrow as well.

Conclusion

We looked at three factors that presumably influence penetration. Kinetic energy, momentum, and FOC. There are other factors that were ignored for now (arrow integrity – it can’t break on impact, arrow flight – we assumed that your arrow was perfectly tuned to your bow, relative diameter of broadhead ferrule and shaft – if the shaft is narrow, there will be less drag on the arrow from body tissue, shape of the broadhead – length to width ratio and type of bevel, and more).

One of these has only an indirect influence on penetration, and that is kinetic energy. Momentum is what counts when it comes to resisting the slowing-down forces of the animal’s body. Arrow speed does increase momentum, so it definitely has an effect. But not as dramatic an effect as the mathematical number of kinetic energy seems to suggest. As indicated by the example, for two arrows with practically the same kinetic energy, the heavier one has significantly more momentum. By the way, it also has a significantly higher %FOC (21.8 vs. 14.8).

So why doesn’t everybody shoot 1000 grs arrows? Because of trajectory. A lighter arrow shoots flatter than a heavy one. And if your arrow gets so heavy and the flight so curvy that aiming becomes difficult, you may just have lost all advantage. You can make up for that by increasing your bow’s draw weight, but not everybody is physically equipped to handle that (including me).

In this treatise that already ran on too long, we haven’t even touched on what stands on the receiving end of our arrows. It makes a difference whether you are hunting rabbits, a turkey, a small Southern whitetail, a big Northern mule deer, elk, moose, or bigger. Or shooting 3D targets. As a totally unbiased TV show watcher, I get confused by the number of whitetail deer of medium size that I see running off with considerable lengths of arrow sticking out of them on the shooter side. These are shot predominantly by compound bows of recent manufacture. And they are not shoulder hits, where the arrow might encounter heavy bone. In my layman’s perspective that means that something is not right. If they can’t get an arrow through a broadside deer, with all the power of their compound, how am I going to kill one with a light longbow? Are they shooting ultra-light arrows, chasing the speed that the bow manufacturer claims kills? I don’t know. All I have figured out is that I am going to build the heaviest arrow I can shoot out of my bow with a trajectory that still makes sense for hunting. What exactly does that mean? Once I have it figured out I will report back.

Frans Diepstraten