Book Review: Mouthful of Feathers

Upland bird hunting books are not rare. Ranging from how-to volumes to the more esoteric; from accounts of hunting everything a continent has to offer, to state, region or bird-specific exploits; from well-written, thought-provoking essays, to rather unassuming barstool tales. They are all fun to explore, if you are interested in upland bird hunting, but not all of them leave a mark. Some are destined to be consumed and forgotten, providing temporary distraction from the drudgeries of life. Others make you feel something, make you think, create impressions that linger. If you are open to it, “Mouthful of Feathers – Upland in the West” belongs to the the latter category.

If you are hoping to find a raucous read of the “I came, I saw, I killed a limit” kind, this is not your book. In fact, not too many birds get shot in the stories that comprise this volume. If you are after details about guns and gauges, you will also be disappointed, as I think there is only one story that specifically mentions a gauge, when talking about a lost childhood gun.

Eleven stories take you from a stormy rainy day in Alaska, to the desert border country of Arizona; from searching for the tiniest of quail to remembering days gone by hunting the biggest sage grouse. Tales of solitude and simple days on the plains (read the book to find out why I cannot say prairies anymore), with a bag limited in numbers, but limitless in memories. There is even mention of New England, but since this is a book about the West, the author is leaving it behind. In between the chapters, the editor placed annotated quotes, little gems that stand on their own, and reset the mind for the next story.

It’s hard to pick a favourite story, as they are quite diverse in nature. I recognized myself in a few of them, knowing I’d have chosen the same pursuit that day. Even though there was no attempt at making it sound glorious, or even slightly appealing, after reading one tale, all I wanted to do was load up the dog, get lost on a dirt track somewhere and waste time drinking beer, roasting wieners, think deep thoughts about my life and the past and future of our planet. Bird hunting optional. And I don’t even like wieners.

+++

This book was published as en e-book in 2013, and plans to go to print never materialized. I bought it through the Barnes& Noble website, in “Nook” format. For less than the price of a Double Tall Soy Latte with a Pump of Hazelnut you’ll buy yourself a few hours of dream time.

For easy reading on your tablet, you need the Barnes & Noble Nook app. Canadians beware: this app is not available for you. B&N will happily sell you the file access in Canada, but you’ll be stuck reading the online version, which I found awkward to navigate. Also, I don’t like to sit at my desk to read a book. After purchasing and realizing my predicament, I somehow managed to download the file, have my son convert it to Kindle format, and finagle it onto my brand new Kindle reader.

There was only one other drawback to this book: it was too short. The book itself provides the perfect quote: “Lunch was concluded with a foamy mouthful of Pilsner. It was just enough; not so much that I didn’t want another swallow. It’s nice to finish a beer wanting a bit more.” After reading this you’ll likely want just a bit more. Luckily, a print book has been announced with all new material for the summer of 2023. Available for pre-order now. I ordered mine. In the mean time, blog posts on the Mouthful of Feathers website by some of the same and other authors will have to fill the gap.

Project Duck Boat – Part V (Finale)

The alarm went off at an ungodly hour, and it took a quick shower to get some of the haze out of my head. I don’t know who these people are that jump out of bed straight into their boots, and are ready to go, and I don’t understand how they do that. Regardless of what the day ahead has in store, waking up is a process for me. With joints creaking I took the dogs out for a quick one, and slowly the blood started pumping and the brain geared up.

It was a long dark drive to the lake I had scouted out in the spring, and this being opening day, I feared I’d show up at the sandy staging area on the North side a little late, with other hunters out on the water before me. This sneak approach really only works if you are the only one, or the first one, to paddle along the reeds.

I needn’t have worried, nobody was there. It was still cold, and the last of the fog was rising off the water as I set off. In spring the marsh had been full of sound of ducks and geese. It was a lot quieter now. The 20ga loaded with steel shot #4s rested on my right, and slowly I paddled the meandering water. When a couple of teal came soaring past, I dropped the paddle, grabbed the gun, swung, and missed twice. Not a great start.

A little later I happened upon a pair of teal, that took off as soon as I came around the bend, and I managed to drop one! As the morning progressed I added three more to the tally, before I ran out of suitable water. There had been some gun shots on the south side of the lake but otherwise I had the place to myself. Plenty happy with my modest harvest I drove home.

That night we had a wonderful dinner of pan-seared duck breasts. Ducks make a fantastic meal, if treated right, meaning searing it on high fire and briefly. You want, no must have, the insides still pink, or risk the meat turning dry and livery.

We ate this with ciabatta bread, oven-roasted tomatoes and onion, and a balsamic reduction drizzle (that’s nothing more than balsamic vinegar mixed with brown sugar, allowed to simmer for a bit to make it thicker). It was fantastic!

A week or so later I repeated the routine, hitting up a larger reservoir that has, according to Google Earth, lots of bays and islands on the East side. I’d love to report about my shooting prowess, how I plucked the ducks and geese from the sky with ease, but that would be lying. Two double misses started the morning, but luckily I was up for some redemption and ended the day with a tally of six ducks. The number of shots fired will hopefully fade from memory, as my brain chooses to remember the highlights of the day only.

This is not a way to get big bag limits, and it was never intended that way. But it allows quiet time on the water, taking in the sights (like the two otters I saw on the first outing), relaxing through the morning, and potting the odd bird for dinner. It’s nice too to vacate the water before noonish, as this is generally a day resting area for birds, migrating birds in the latter half of the season, and they need their quiet time too.

And that’s it. Project Duck Boat finished, but in a way it’s just beginning. We have a month or so left of open water, suitable for such a little boat. I have no intention to fight the fall storms and freezing water. I can get hypothermic in other places without the risk of drowning. Next spring, pike will be waiting in the reeds, to eat the fly that I will present to them.

Good times!


Project Duck Boat – Part IV

Though the solid fresh green colour of the boat really was appealing, the glare was pretty apparent, and for duck hunting purposes it would likely be better to have some drab colour on there. So I decided to try my hand at putting a gentle camo pattern on.

The Rust-Oleum camo spray cans were surprisingly hard to find. I had to go to three hardware stores to get three colours: brown, tan, and light green.

The process was pretty straightforward. After a quick scrub down with steel wool and rubbing alcohol, the boat was sprayed with  a base layer of varying colours; four areas of solid colour covered the whole thing. Then I used dry cat tail stems and leaves as a stencil of sorts, spraying contrasting colours across the leaves. For sharp edges, the leaves would lay flush with the boat, for a more fuzzy effect I’d hold them up a little higher. In general, I didn’t give it too much thought, and fought my inner perfectionist from overworking the colours. Just flop on the plant material, and with quick squirts from left to right and back, get some paint on.

For example, on the stern of the boat, the pattern was achieved by laying a base coat of brown and green, and then spraying a layer of tan with leaves/cattails held in front of it. The tan went through the openings in the plants, leaving the darker base colours to show through on the boat. It’s a lot easier to do than it is to describe.

The final touch (for now) was to add a cross bar, which would serve as a rest for the gun barrel(s).  I didn’t feel comfortable laying a loaded shotgun down flat on the bottom of the boat, because an accidental discharge (never happens, right?) would have some very wet and potentially life threatening results.

A few final squirts of camo paints, and she was all done. Well, almost; I added a strip of rubber on the right side of the cross bar to be gentler on the gun’s finish.

The boat was ready, and duck season was just around the corner (see part V – Finale).

Project Duck Boat – Part III

The boat was looking pretty functional, but the inside needed some tuning up, fixing cracks and chips in the gel coat, adding some foam to the flotation and putting on the top trim.

The push fit trim fit perfectly, and will provide protection from and for the fiberglass edge.

The polyurethane foam from a can was nasty, sticky, and probably unhealthy stuff to work with. It stuck to tools, to hands (gloves!), the floor, my clothes, and some of it even to the old foam in the boat. I could not make this look fancy, so I settled for functional.

After patching the inside bottom, it was time for the final coats of paint and varnish. The transformation was spectacular, if i may say so myself.

I decided to not rebuild the oar locks. In fact I built one, from hardwood , but didn’t put it on. The boat is more like a square-stern kayak, and the oar locks would be sitting quite close to the rower, making for an awkwardly short stroke. I would paddle it like a canoe at first and make further decisions later.

I had some trepidation if I would actually be able to transport it in the truck, but that worked out OK.

The maiden voyage took place on a beautiful spring morning. I went looking for snow goose, found none, but did manage to sneak up on dozens of waterfowl, within easy shotgun range. The concept of using this boat to cruise the edges of lakes might actually work!

After this first trip,  I decided to add a hole to the outboard mounting plate, so I could rig up an anchor of sorts, which would be helpful for fishing trips.

With spring season over, it was time to put on the final tweaks (see Part IV).


Project Duck Boat – Part II

After a thorough clean and a a proper sanding job, two things had become clear. Firstly the outside of the hull was not in as bad a condition as I had thought, and secondly, there were a lot or divots, scratches and imperfections to fill up. I decided on a skim coat of epoxy for most of the underside.

Since I was using slow-setting epoxy, the same kind I used when building the longbow (see Building a Longbow – Part II ), I needed a source of heat the keep the epoxy well above room temperature while outside the snow was blowing and it was freezing hard. I went through a number of heaters. My electric ceiling heater overheated and started spewing smoke, and a heating fan motor just stopped. The plug of an electric radiator became so hot that it could only be used a few hours at a time. The construction lights proved the most reliable but they only covered smaller areas. (lights below are pointing upwards to reduce the glare for the photo)

It took about a week to get the skim coats done, and a first layer of primer put on.

The next step was very satisfying: putting on a coat of paint! Not wanting to spend hundreds of dollars on a true marine paint meant for vessels that are in the water for long periods of time (like in a harbour), I picked paint that was meant for surfaces exposed to water, but not necessarily submerged all the time. The outside of the boat looks like the million bucks I didn’t spend, once done.

I used the same green to touch up some mallard decoys.

The inside of the boat still needed a fair bit of work (see Part III)

Project Duck Boat – Part I

She came to me on a cold November evening, and was unceremoniously dumped onto my garage floor. When Lee had said she might need a bit of work, he hadn’t been kidding. Anything wood was crumbling, anything metal had rusted, the fiberglass would need some touching up, trim had partially come off and was swaying gently in the cold Western breeze. But on the bottom lay a gentle layer of mud and grass, faintly smelling of the marsh. A few duck feathers clung to the hull, stuck to a patch of dried-up blood. It was clear: this was my new duck boat.

Where I live, it’s rather hard to give a boat, or anything really, a good hose-down between mid-October and some time in April. First of all, the water will be disconnected to prevent freezing of the pipes, and unless you want to turn the cull-de-sac into a hockey rink, water is best not used outside. But a series of buckets with hot water and soap turned to mud as I tried to clean my new prize inside and out. The kitchen drains did not clog, so I must have diluted the grime sufficiently.

The boat was stripped of anything that would come off: the oar locks, protective strip along the top and the piece of rotten wood on the transom. Before me now lay a blank slate. One in need of some serious sanding, a coat of epoxy and a few layers of paint. But first the most pressing issue needed to be addressed, the rotten outboard motor mount.

I have no immediate intention to use a motor, but it would be nice to have that option some day. Unfortunately the wood of the mountain plate was very wet and very decaying. All the softwood layers of the multiplex had turned to mush, in I spent a few days prying away at it to get that out as much as I could. Then I set the boat upside down and ran a heater under the transom for a long time, until, much later than I had thought, the inside appeared to be dry. In the mean time I started work on the hull (see Part II).

Enter modern chemicals, which according to the label turn mushy, punky wood into rock-hard material. Not sure if it did, but I poured it on thick. Next I used hardwood and bamboo strips and an epoxy to fill up the voids. It still being the middle of winter, all use of epoxy required lamps or heaters to provide a temperature that allowed it to set.

Once that was done, I rebuilt the outside by using aluminum strip, filling the surface with more epoxy.  Time to continue working on the hull!

(Continued in Part II)

Canoe trip on the Red Deer River

“On May 17 2020, a catastrophic failure of the St. Mary canal occurred in the state of Montana […] this canal diverts water into the Milk River […] greatly reduced water volume […] river levels are now insufficient for canoeing and kayaking”.

The one year that we had finally committed to canoeing a stretch of the Milk River in Southern Alberta, East of where most people paddle, there was no water. We’d been ignoring this message for a few weeks, but hours before our intended departure the flow meters on the river showed the sorry reality: we needed 18-20 m3/h, and we had 2.8. Now what?

Some quick thinking (mostly by my family), brought us to the Red Deer River. A whirlwind of Youtube videos and a phone call to our hair person’s husband later (who had done a stretch just a week earlier), and the decision was made: we’d float down the Red Deer River, from the Content Bridge to Bleriot Ferry, or a little further if we were quicker than expected. The latter stretch is mostly done in four days, but we saw a lot of leisure time and beer drinking in the videos, and we figured we could do it in three.

We ended up doing that stretch, plus some 35 bonus kilometers in exactly 48 hours; from Thursday noon till Saturday noon. The water was high; we drifted between 4 and 7 km per hour, and any paddling was extra. On average we moved a little over 7.5 km/h. The weather was perfect, not too warm, not too much wind, and though the high water limited the camping opportunities we managed to find spots along the river with some searching and perseverance. We need to do this again soon!

The Great Divide Trail – Section B-ish: The Plan


Hiking Section B of the Great Divide Trail; the commitment was quickly made, the plan is taking a little longer.

Somewhere along the GDT - 2013

My daughter Rianne brought it up first, and she mentioned doing it alone. Her mom volunteered my participation. And that was it. A week in July was quickly picked, working around some plans with visitors from the old country. Leave on Saturday morning, get picked up on Sunday a week later. About 200km, some 8 hiking days, 25km per day therefore; sounds doable.

Rianne has done a few mini through-hikes by herself on the island (that is Vancouver Island); four nights on coastal trails here, a loop in the mountains there, and a brutal inland trip that ended in a death march out, when, after days of rain and mud, the snow on the high trail had become more than hip-deep. She can be pretty tough when she wants to. But she’s not a big girl, and heavy packs grind her down.

My experience lies more in multi-day hunting and scouting trips. Nothing too onerous, and very few with the sustained higher mileage for longer periods of time (mountain hunting requires a lot of sitting around, using binoculars to find animals). Recent accolades include one finished 51km mountain ultra, and one 55km non-race mountain run, but I’m not a big guy, not very strong, and heavy packs grind me down too.

So we have lots to figure out before we embark on an 8-night trip, where we have to carry all supplies from the start.

Here are some topics that immediately sprang to mind:

Food:
What are we going to eat? I can eat Heather’s Choice breakfasts everyday without tiring of it, and Rianne can eat our home-dehydrated chilli pretty much every night and still want more the next day. But I’m kinda picky with dinners, and she’s very picky with breakfast, and the prospect of 8 days of bars for lunch is enough to make me nauseated.

Pack weight:
Neither of us has ever invested in super-light gear. I’ve been whittling down the amount of stuff that I take, but not to the extent that it makes a big difference. Rianne tends to take the kitchen sink, plus utensils for cleaning it, so she will be even more challenged. Just the food will probably run 15lbs per person for 9 days.

Fitness/injuries:
I will have to ramp up the strength training for sure, if I am to last nine days on the trail, carrying a big pack. I’m not worried about the cardio. I have a 32km race with over 9,000’ of elevation gain scheduled two weeks before departure, I will just about be rested up when we leave. But we will have to do a few prolonged training hikes with full packs to get at least some preparation for what lies ahead. I can only hope that all of the current aches and nags in foot, leg, back, and other parts of the body are mostly healed by then.

Rianne has a demanding day job, that cuts into her evenings and weekends, so she’ll be even more challenged to get back to her lean-tough self.

Footwear:
Normally I would grab my heavy hiking boots for any backpack trip, but I’m going to try using trail runners. Probably Hoka’s Speedgoat’s, but I’m eyeballing the new Altra Timp 2.0 as well, which has the nice wide toe box, but more cushioning than the Lone Peak’s that I use for runs. A shake-out trip will be required to see if I am willing to take that gamble.

I feel we are pretty good on all the rest. We’ve been on backcountry trips before, both alone and together. We know what to expect, the only surprises (hopefully) will be the beautiful views. I’ve been to one little piece of the trail in the past, a gorgeous spot, where my friend saw a wolverine a week after we were there together.


Flowers along the GDT - 2013

Ah, why Section B-ish? Well, we don’t know exactly where the start is, but it looks like a part of it may be on a road, about 10km or so, so we’ll drive that, and start where the road ends. And we have our eyes on a little detour towards the end, where it appears that the trail follows a forest road for long stretches. A well-chosen left turn will bring us to Cadorna Lake, and beyond that Coral Pass, before descending underneath a few glaciers to get to the finish line. Sounds a lot more attractive than slogging on a road.

And that’s the plan. Stay tuned for updates on the preparation.

The Mental Game

Disclaimer: I know nothing. These are just some thoughts that describe my struggle.

Warning: If you cannot possibly imagine what “The Mental Game” could mean in the context of shooting a longbow (or recurve, or anything else launching a projectile), you should probably not read this. Nothing good can come of it for you.

Hi, my name is Frans, and I have target panic. There, I said it. Target panic. It’s ugly. I first suffered through a terrible bout of it during my biathlon days, specifically during standing shooting. I could line up the circles of rear sight, front sight, and target perfectly, and hold still like a champ. I just could not pull the trigger. And if I did pull the trigger during this perfect alignment, I’d jerk it. And miss. At least I think I jerked. Not sure what happened. But I did miss. Often. I never really got over my problems with standing shooting.

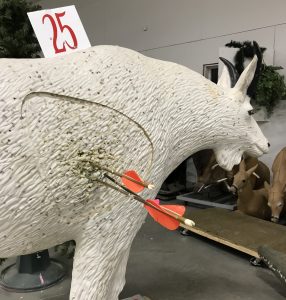
Fast forward a decade or so. I’m out at a friend’s place north of town on a Sunday morning. After a coffee and a half hour of solving the world’s problems, we are outside, flinging some arrows. I haven’t shot at anything past 10 yards for a month or two. We just shoot, no expectations, no pressures. My first shot at 20 yards goes a bit low. The second is on the 10 (there is no actual target with a bull’s eye, just a back stop and a tiny piece of cloth stuck into an arrow hole; I’m just guessing score to give you an idea). We shoot a few more, and I am in the tens repeatedly. We step back to 30 and I shoot 9’s and 10’s. Back to 40 yards. I get lucky and judge the hold-over correctly, and place two arrows within inches of the X. All this time, my friend is not stingy with praise: “I don’t think I’ve ever seen anybody shoot this well with traditional bow”, and more of the same. At first I just smile and keep shooting, but it isn’t long before all these accolades break down my composure. Thoughts creep into my head about the result of the next arrow before I even shot it, and that I truly am a great shot, and if I hit another 10 my buddy will think even higher of me, and more unsavoury brain waves. And yes, it went downhill fast.

Here’s how target panic plays out for me. I’ll go through my shooting process, draw, anchor, aim… and then I can’t let go of the arrow. It’s the standing shooting at biathlon all over again. Everything looks and feels perfect, but I just can’t “pull the trigger”. Every so often I let down, and try again; most of the time I try to force a shot (because that is what I’m there for, shoot at something). Things that might happen include collapsing (resulting in a dud arrow that hits low), or a botched release (hanging on to the string too long), flinching (starting to let go of the string, but then holding on), or, miraculously, a recovery (usually involving straightening out the collapsed form) and a good shot. Every botched shot leads to uncertainty about my abilities and increases the anxiety for the next one.

I’m trying two things to get past all this, and it appears to have some results. The first component is to improve my shot mechanics. Better mechanics means better arrows, more “tens”, and with that comes confidence. Confidence is the enemy of target panic. I don’t have a coach, I don’t know a coach, and even if I knew a coach, I’d be too cheap to hire him or her. Enter social media, where everything is “free”. The guys from The Push Archery (https://www.thepusharchery.com) have run a series of podcasts with an archery coach (Tom Clum Sr. of Rocky Mountain Specialty Gear www.rmsgear.com), breaking down the shot sequence into its components: the correct stance, how to hold you bow, how to place your fingers on the string, the bow arm, draw, release, etc.). Very valuable information, though without visuals you may need to listen to certain segments a time or two. They also produced a training/coaching video, which I haven’t seen (because it costs money – see statement above about my spending habits). I worked through all the information and built it into my shot sequence. I now have something to fall back on, when for some reason the shooting isn’t going well.

The second component is mental. All the mechanics in the world will not help, if you forget to execute when the pressure is high. At the 3D range with people watching, with a deer in front of you, or even just self-imposed pressure, practicing in the back yard. I’ve listened and watched Joel Turner of www.shotIQ.com explain his approach, and though I am too pigheaded to accept everything he teaches, a lot of his doctrine has merit. You’ll have to see and judge for yourself. The thing I applied to my shooting was the use of key words, to help my numb brain remember all the steps.

After estimating the distance to target, I start off each shot by adopting the proper foot placement, and tell myself “stance” (not sure how this is going to work in a hunting situation, but I guess it won’t hurt using a split second to check which way your body is turned before starting the shot, if circumstances allow). I then make sure I have my fingers on the string properly (the hook), and the bow hand grips the bow loosely with just the thumb and index finger; all other fingers curled in. “hook and hands”. I raise the bow, and deliberately turn my face towards the target as far as it will go, to minimize the risk of turning my head into the string, and ripping skin off my nose: “raise and face”. Now the bow is up and slightly above target, string hand wrist out, arrow pointing left of target (I shoot right-handed). I’ve adopted the rotational draw, which helps me get my back engaged and have a stable anchor. Having your wrist pointed outwards enables that. Look it up, it works. Because now we’re getting close to the point where I tend to fall apart, I have started to remind myself to not be a jelly-brained loser: “be strong”.

I draw and anchor, and if I have done things right, it feels good and solid, and the arrow is pointing where I want it. This is where I (stubbornly) depart from Joel’s teachings. Joel preaches the use of a so-called psycho trigger. The idea is that the release is initiated by something that is not a conscious effort. You concentrate on maintaining form and aim, expand the draw, and either a feather touching the nose or a clicker or something peculiar like a grip sear going off should have you magically release the string. Well, my brain is not wired that way. I am a control freak (probably one of the reasons behind the target panic) and my system just does not allow trusting something as unpredictable like that. Many people get good results with it though, it might be worth trying. It’s just not for me. In addition to that, I am staunchly refusing to add complication to what is supposed to be the simplest of tools, so no clicker or other gadgets.

My release “trigger” is a solid bow arm. If I’ve done everything right, I’m at full draw, locked on target, and all I am waiting for is that bow arm to be steady. No wobble, no shaking. Release.

Unless I waffle. And I do waffle sometimes. It’s a work in progress, but every good arrow builds confidence. Every poor arrow whittles it down. Joel says “shoot this arrow perfectly, or don’t shoot it at all”. Only perfect practice makes perfect. Don’t fling arrows mindlessly, and wonder why you don’t get consistent results. Consistently good arrows build confidence. Confidence is the enemy of target panic.

Simple, right?

Please read the first line of this post again before trying any of this out. Let me know how you fought target panic in the comments below. I’m always looking to put more tools in the quiver.

FD

Write your story

Conferences, meeting with vendors, training sessions, these are all good occasions to score free note books. I get childishly excited when I receive a nice one. Reluctantly it opens as I pull on the front cover, as if it doesn’t quite want to reveal the virgin pages inside. Immediately I start dreaming about the stories and the notes that I will put in it. With apologies to conference organizers, trainers, and people that try to sell me something, very few of those fleeting dreams relate to work.

Unfortunately only two of these notebooks have been used. As excited as I am about the prospect of collecting my observations through a whole year of hiking, scouting, and hunting, I rarely actually do it. The white paper intimidates me, it urges me to not defile it unless I have something of relevance to commit to paper. So my notes go on loose sheets of printer paper: telephone numbers, doodles, names of basins I suddenly remember I need to revisit, things do do, and especially many more doodles – I’m in a lot of phone meetings – until nothing is really legible anymore, and all context is lost. The sheet of paper first goes on a pile and then into the recycling bin.

The first exception I made for the 2013 sheep hunt in Cadomin. According to my notes Darren suggested I’d keep a journal, and indeed I did, at least during the preparation phase. It’s fun to read back and go through the process of discovery of a then-new area again, and smile at some of the comments reflecting uncertainties and questions that have long since been answered.

The first time I actually used a journal to collect my thoughts and organize my memories during a hunt was on last year’s tahr adventure in New Zealand. Every night, inside the tent, I would scribble down the events of the day. Days were short in the middle of the Southern winter, and with temperatures below freezing and no campfire, retreating early to the warmth of the sleeping bag was not something that needed encouragement. I don’t think I’ve ever slept better (and longer) in the backcountry than on that trip.

So, after these quick trips down memory lane, I have made my 2019 resolution: keep a journal, a record of training runs, hikes and scouting trips, planning and actual hunts, bow shooting practices, and whatever else seems relevant. To get over my fear of white paper I have made my first note in a brand new, clean, virgin notebook. There is no going back now. I suggest you do the same. One day you may achieve fame or notoriety and after you die your grandchildren will fight over who gets to auction them off to pay for their mortgage. In any case, years from now it will be fun to relive some of your adventures (provided you have better handwriting than I do – I find my notes very hard to read).

Go ahead: write your story!

P.S. Kyle is much more diligent than I am and keeps notes of most multi-day trips. On his phone. Which I doubt will have the same appeal and value at the post-mortem auction.