Moose sausage bounty

Long, long overdue was the making of sausage from the bags of moose ground patiently waiting in my freezer. With hunting plans foiled by a persistent health issue, a beautiful September morning was as good as day as any to whip up a trial batch of three flavours of moose sausage: jalapeno/cheddar, chorizo(ish) and bratwurst.
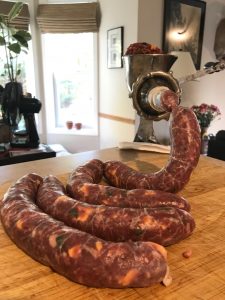
I won’t dive too deep into the sausage making process, there is so much material available, I don’t need to add to that. Here are just a few highlights, observations, and recipes adapted from online sources that seems to be quite OK for our palate.

The meat

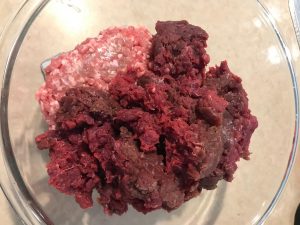
We mixed clean moose ground (removed most of the undesirable tissue before grinding) 50/50 with store bought lean pork ground. I feared we would be a tad low on fat on the final product and I was right. Next time I’ll look for something a little fattier to mix in. But I don’t mind a fairly dry sausage, so in a pinch I’d use the same mixture again.
The spices and additives

For the jalapeno/cheddar we used regular old cheddar, but I saw a thing called ‘high-temperature cheddar’ on the sausage making supplier’s list later. Perhaps that resists melting during the cooking process a bit better, so the cheese doesn’t run out of the sausage as much as regular cheddar.

All the other ingredients were just what we could buy at local grocery stores. Some of the more exotic ingredients were not available without going into the city, which I didn’t do.

The recipes

I’m just giving the ingredients. Everything was mixed well, and stuffed into real hog casings (29-32mm in diameter) using a hand-powered cast iron stuffer. Yes, those still exist.

Jalapeno cheddar
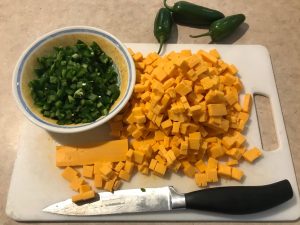
jalapenos (medium size, pits and white stuff on the inside removed; diced)
1/2-1 lb cheddar (one source called for a full pound of cheese, I ended up using less)
4 tsp salt (next time I’ll do 3 tsp, as it came out a bit salty)
2 tsp black pepper
1/2 tsp sage powder
1 tsp garlic powder
1 tsp garlic powder
1 tsp smoked paprika

Chorizo(ish)
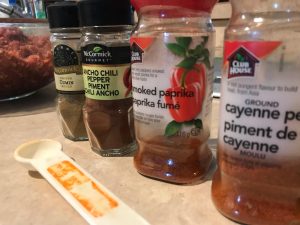
I’m calling it Chorizo(ish) because we couldn’t find a number of ingredients, and shied away from some of the quantities of spices mentioned in a recipe we found. We were going for a milder taste, not a burn-your-tastebuds-off-your-tongue experience (adapted from this recipe at honest-food.net).

1kg moose + 1kg pork
3 tsp sea salt
1 tsp cayenne
2 tbs ancho chili powder
1+ tsp chipotle paste (I couldn’t tell you how to get this, my wife brought some home from work. It’s really concentrated stuff. Could possibly be replaced by the chipotle chili powder I saw at Safeway
2 tsp cumin
2 tbs oregano
8 garlic cloves
1 tsp smoked paprika

Bratwurst
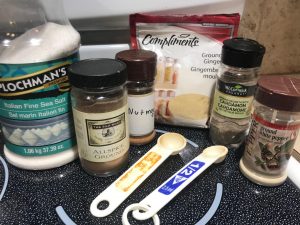
Ended up using 1 kg of pork ground and 3/4 kg of moose for this mixture.

2.5 tsp sea salt
1/2 tsp sage
1/2 tsp cardamom
1 tsp white pepper
1 tsp ginger
1 tsp allspice
1/2 tsp nutmeg
1 onion chopped finely

We have two more 3 kg bags of moose ground in the freezer. I am so happy that my friends convinced me to come back out with the rifle after an exhilarating archery season, even though it felt like cheating at the time. The bounty coming from this animal has no end (well, sadly it will have an end, but for now, we are still eating it).
Moose tongue cakes

Like crab cakes, but made from moose tongue. Sounds delicious?

The other day I finally found the moose tongue that  I knew was hiding in one of my freezers. As I announced my plans to make a dish out of it, my wife immediately declined any further involvement, including the eating part. My kids were reluctant to share my enthusiasm, but not immediately opposed to the concept. In order the stay as mainstream as possible I decided to try to make breaded patties from shredded/cut-up meat and fry those up in some oil.

Step 1: Get a moose tongue

You can try the hard way, the saga of which you can read here: “Your Mother Mated a Donkey!”. Or perhaps you can ask anybody hunting moose for a tongue, chances are he or she wasn’t even planning on bringing it home anyway. Prepare for weird looks and comments of disgust.

Step 2: Clean the tongue and boil it

In my case the tongue had been inflicted some damage during the retrieval process, so it needed a decent wash in cold water, and removing of the tip which was torn up (done prior to freezing).

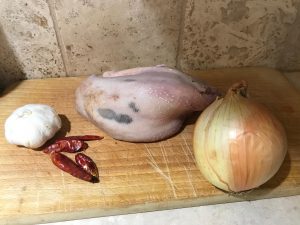
For the boil I used 50/50 water and stock, and I added salt, garlic, dried chili peppers and some onion. Boil for 4 hours.

Step 3: Chill in ice water and peel

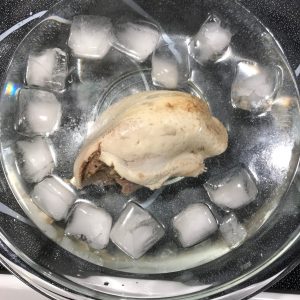
The outer layer of the tongue is practically inedible and needs to be removed. According to those in the know, this works best of if you dunk the tongue in ice water after the boil. The top layer indeed came off fairly easily. Remove any tissue that either looks offending of feels like it would take more than five minutes of chewing.

Step 4: Shred, season and bread

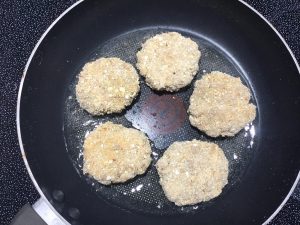
Shred the meat or cut into very small chunks. Shredding is better, as it will be easier to form the cakes. Add spices to taste, and enough flower to make things stick. Form patties. Sprinkle on more flower, dip in egg (scrambled up with a fork), and coat with breadcrumbs of your liking.

Step 5: Fry in oil

Self-explanatory I would think. Don’t set the heat too high, as you want the meat to heat thoroughly before the breadcrumbs burn.


Step 6: Throw away the moose tongue cakes and order a burger

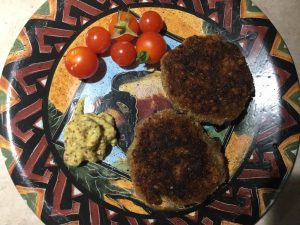
I bet you believed me. But actually, they tasted pretty good. The meat is on the fatty side of the spectrum, so the texture is not what you’d expect from venison. The first bite was a bit weird therefore (I never had moose tongue before). But I ate two, my son ate one, my daughter tried a bite and said she would have eaten more had she not known it was tongue. My wife staunchly refused, despite admitting that it smelled delicious.

I tried a piece cold after running an errand (picking up hog casings for making sausage), and did not enjoy it. Eating fatty meat when hot is one thing, eating it cold did not agree with my taste. In any case, it’s an interesting cut of meat, worthy of attention. There is a myriad of other things it is suitable for apparently, even as a cold cut for sandwiches. Next time I get a moose, I may have to try that. My wife already said “no” to that as well.

Moose shanks – the best cut?

When I posted a photo of a cross-cut moose shank, someone commented that it looked about as thick as the neck of a whitetail deer. I suppose that depends on where you hunt, but the shanks of a moose surely supply a few decent meals; delicious meals, if done right. Now you can grind them all into burger, but frankly, I think that’s a sin. Read on to learn my simple recipe for melt-in-your-mouth moose shank meat.

Granted, it’s not too difficult to turn the shanks into an inedible, tasteless chunk of hard rubber. The three key ingredients to beautiful, succulent shanks are:  moisture, low heat, and time. All the rest is optional, though I do not recommend skipping on some spices.

It doesn’t matter if you cut the shanks bone-in, or if you strip them and tie them into a roast, or you just process them as they come off the bone. Take the meat, dry it with some paper towel and rub it generously with course salt, pepper (black, cayenne, or chili flakes), garlic powder, smoked paprika powder, and regular paprika powder. Brown the meat (like really nicely browned) in oil in a Dutch oven, or another pot that can go into the oven.

Take out the meat, put it aside and brown a couple of onions, and a handful of chopped garlic cloves in the residual oil (or add more if necessary). Add a generous amount of chili powder and brown that along with the onions. Throw in a small can of tomato paste and brown that for a bit too.

Return the meat to the pot, throw in two (or more) bouillon cubes, and add (Key Ingredient #1) hot water (recently boiled) to the pot to cover about 80% of the meat (or more). Put the lid on and put the pot into the oven that was preheated to (Key Ingredient #2) 280 oF. Keep it in there for  7 hours (Key Ingredient #3). Have a peak after 4 hours or so. The shank muscles tend to contract and bunch up and rise above the liquid. Turn the meat over so the other side sits in liquid for the remainder of the time.

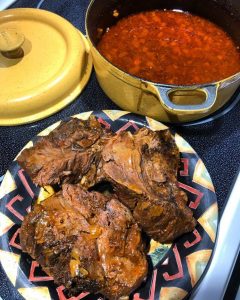
When done, the meat should be fork tender like this:

All the nasty tissue has dissolved or turned gelatinous, and the meat is soft, and flavourful.

Now, if you have time, and are so inclined, you could take the meat out, and cool the liquid in the pot. The fats will solidify so you can scoop them off. Or you can just skip that step. Depending on how thick you want your gravy and the amount of liquid you used, you may want to take a heaping table spoon of cornstarch, mix it with some of the liquid and stir it through the gravy. A few minutes of simmering will thicken it.

Serve with whatever you feel like.

Cheers!

FD


Backcountry food – Protein balls

Protein bars that are both tasty and healthy are not easy to find. Most commercial products that I have tried I don’t like, there is just something off-putting in them (notable exception: Packaroons by Heather’s Choice; the orange-vanilla flavoured ones are the best: www.heatherschoice.com/products/orange-vanilla-packaroons).

So we started making our own. They are fairly simple to produce, and tasty (we think). I vacuum-wrap them in packages of four, giving me roughly 500 cals and over 30 grams of protein as a trail snack. Here is the recipe, if you, like me, are tired of Cliff bars. In italics are the quantities I used per batch in the latest production round. I don’t like making bigger batches because it’s becomes more difficult to get everything mixed well.

Ingredients*:

– 0.5 cups dried dates/prunes/cherries (105 gram prunes/30 grams cherries)

– 1 cup almonds (150 grams)

– 0.5 cups unsweetened shredded coconut (45 grams)

– 1.5 cup protein powder (we use chocolate flavour – 120 grams)

– 1 tablespoon coconut oil (liquid)

– 1 tablespoon chia seeds

– 1 teaspoon cacao powder

– shredded coconut to coat balls

– milk/water as needed (not much)

Extremely complicated directions:

1. Using a kitchen machine, finely chop the almonds. You really need a machine, as you are trying to get it powdery almost (some chunks will resist the spinning blades, which is fine).

2. Add all other ingredients, except for milk/water

3. Chop/mix everything in the machine until there are no more large pieces of anything (doesn’t take too long).

4. With the machine running, add some milk or water, slowly. Doesn’t need much. The contents will start to stick together. Keep adding (a little bit) of milk or water until suddenly everything is sticking together in big blobs of mixture and likely your knife is spinning freely without agitating the mass inside your appliance.

5. Take the sticky mess out, form balls, coat them with shredded coconut.

6. They are ready to eat, but you can also put them in the dehydrator for a few hours to make them less sticky and reduce weight somewhat. I like them better that way.

7. Vacuum wrap, or chuck them in a ziplock bag and freeze (not sure if that is necessary, whenever I do a small batch they don’t last long)

Approximate nutritional value:

Per protein ball of approx. 28 grams (1 oz):

130 calories

7.6 grams of fat

8.8 grams of carbs

8.0 grams of protein

*I hope I didn’t steal this recipe off someone’s website. I’d like to think it was a compilation of a few ideas we picked up here and there, but if I actually did copy it verbatim from somewhere, I apologize. Maybe you can feel flattered that your recipe was good enough to share with a bigger crowd.